Load Testing
Load testing your service, stressing it until it starts to fail, is one of the best ways to prepare for a point in the future when your service has more load than it does today. This guide will help you configure and run a load test against your service.
Use a test config to define the load pattern for your test. Start by making a copy of the test config performance-100replicas since the built in test configs cannot be modified.
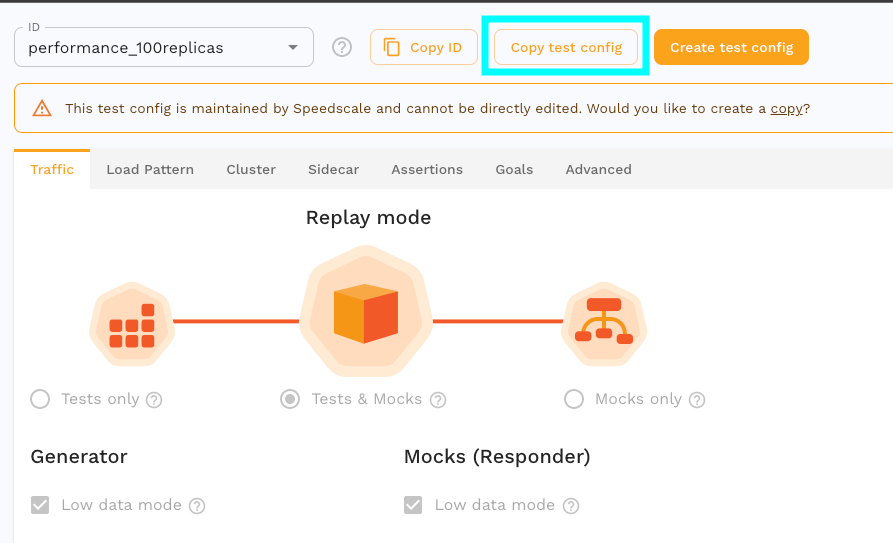
Notice the existing settings on the test config like low data mode.
In low data mode only sampled response data of failures will not be sent to Speedscale for analysis. This limits the number of RRPairs that will be collected and processed with assertions, defined on the Assertions tab, but enables much higher throughput than can be achieved otherwise. Status codes will be compared in low data mode which determines the overall accuracy of the replay report.
Now click on the Load Pattern tab to configure load for the replay. From this screen we can edit and add replay stages.
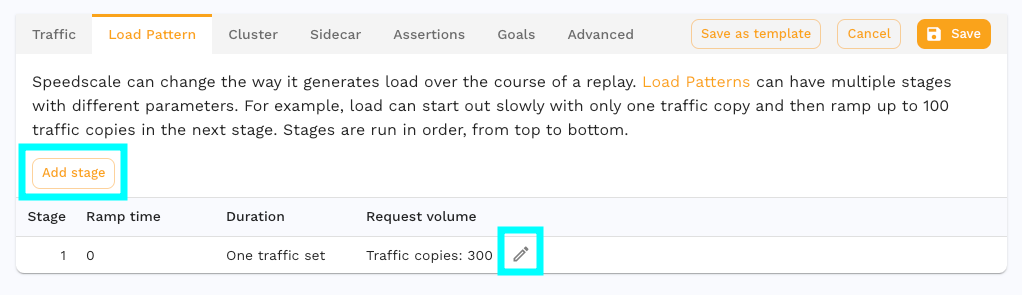
A replay may have one or more stages and each stage may have a different configuration. Let's break down the settings in a stage. Click the edit button on stage 1.
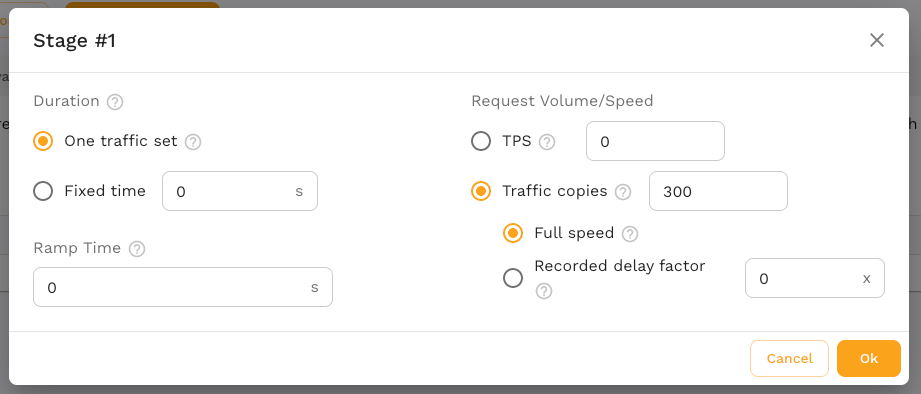
The left side sets the Duration and determines how long the stage will last. Select One traffic set to replay each request in the snapshot only once, per traffic copy. Alternatively, set a Fixed time to cycle traffic from the snapshot until the time is reached. The Ramp time will ramp traffic up to the Request Volume/Speed over the duration given.
The right side sets the Request Volume/Speed and determines fast requests will be made. Selecting a RPS sets the number of requests per second this stage will target. While the replay is running the generator monitors the current RPS and increases or decreases load accordingly, holding load once the target is reached.
Let's look at an example with multiple stages using RPS to control load.
| Stage | Ramp time | Duration | Request Volume |
|---|---|---|---|
| 1 | 0s | 120s | 50 RPS |
| 2 | 0s | 180s | 100 RPS |
| 3 | 30s | 300s | 200 RPS |
| 4 | 45s | 45s | 0 RPS |
This load pattern would result in a replay that looks like this:
| stage 1  |   stage 2  |     stage 3        |stage 4|
|---120s---|----180s----|-30s-|-----270s-----|--45s--|
     ^           ^         ^         ^           ^
     |           |         |         |           |
 stage 1         |         |         |           |
targets 50 RPS   |         |         |           |
                 |         |         |           |
              stage 2      |         |           |
            immediately    |         |           |
          targets 100 RPS  |         |           |
                           |         |           |
                     stage 3 spends  |           |
                    30s ramping from |           |
                     100 to 200 RPS  |           |
                                     |           |
                               stage 3 spends    |
                                the reamining    |
                               270s at 200 RPS   |
                                                 |
                                   stage 4 spends all of its 45s
                                   ramping down from 200 RPS to 0
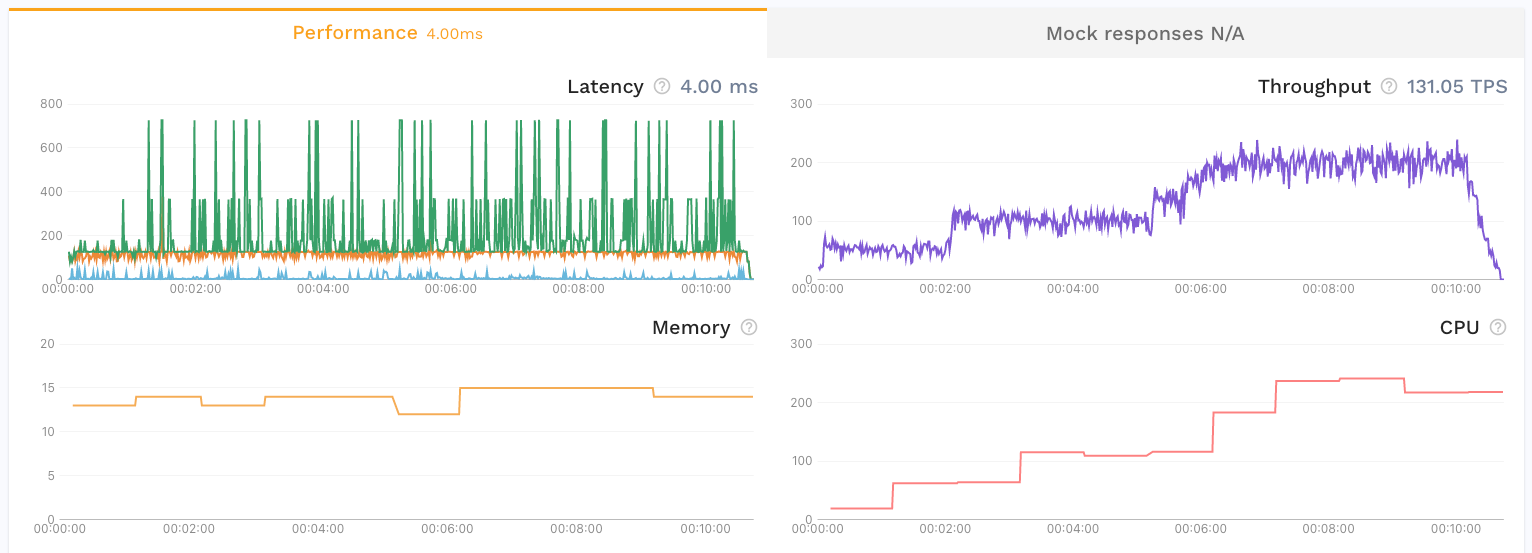
The graph for this load pattern might look something like this:
There are several performance oriented test configs available by default to get you started.
Soak Test
A common use case is to use a small amount of traffic to create a high throughput or long running replay. Some issues are only exposed after sustained load exhausts a resource, which can take time. Extend your traffic with the test config Duration setting. This will run your traffic in a loop for the entirety of the duration.