Multi-Service Replay
Some applications require communication between multiple services to work correctly. For example, imagine an API server which requires an authentication token. In production a client might make a request to an auth service to get a token, then send that token to the API server. In this guide we will configure Speedscale to run a replay simulating this example.
Create Snapshot
Select Traffic
To start we will need to create two snapshots and merge them together.
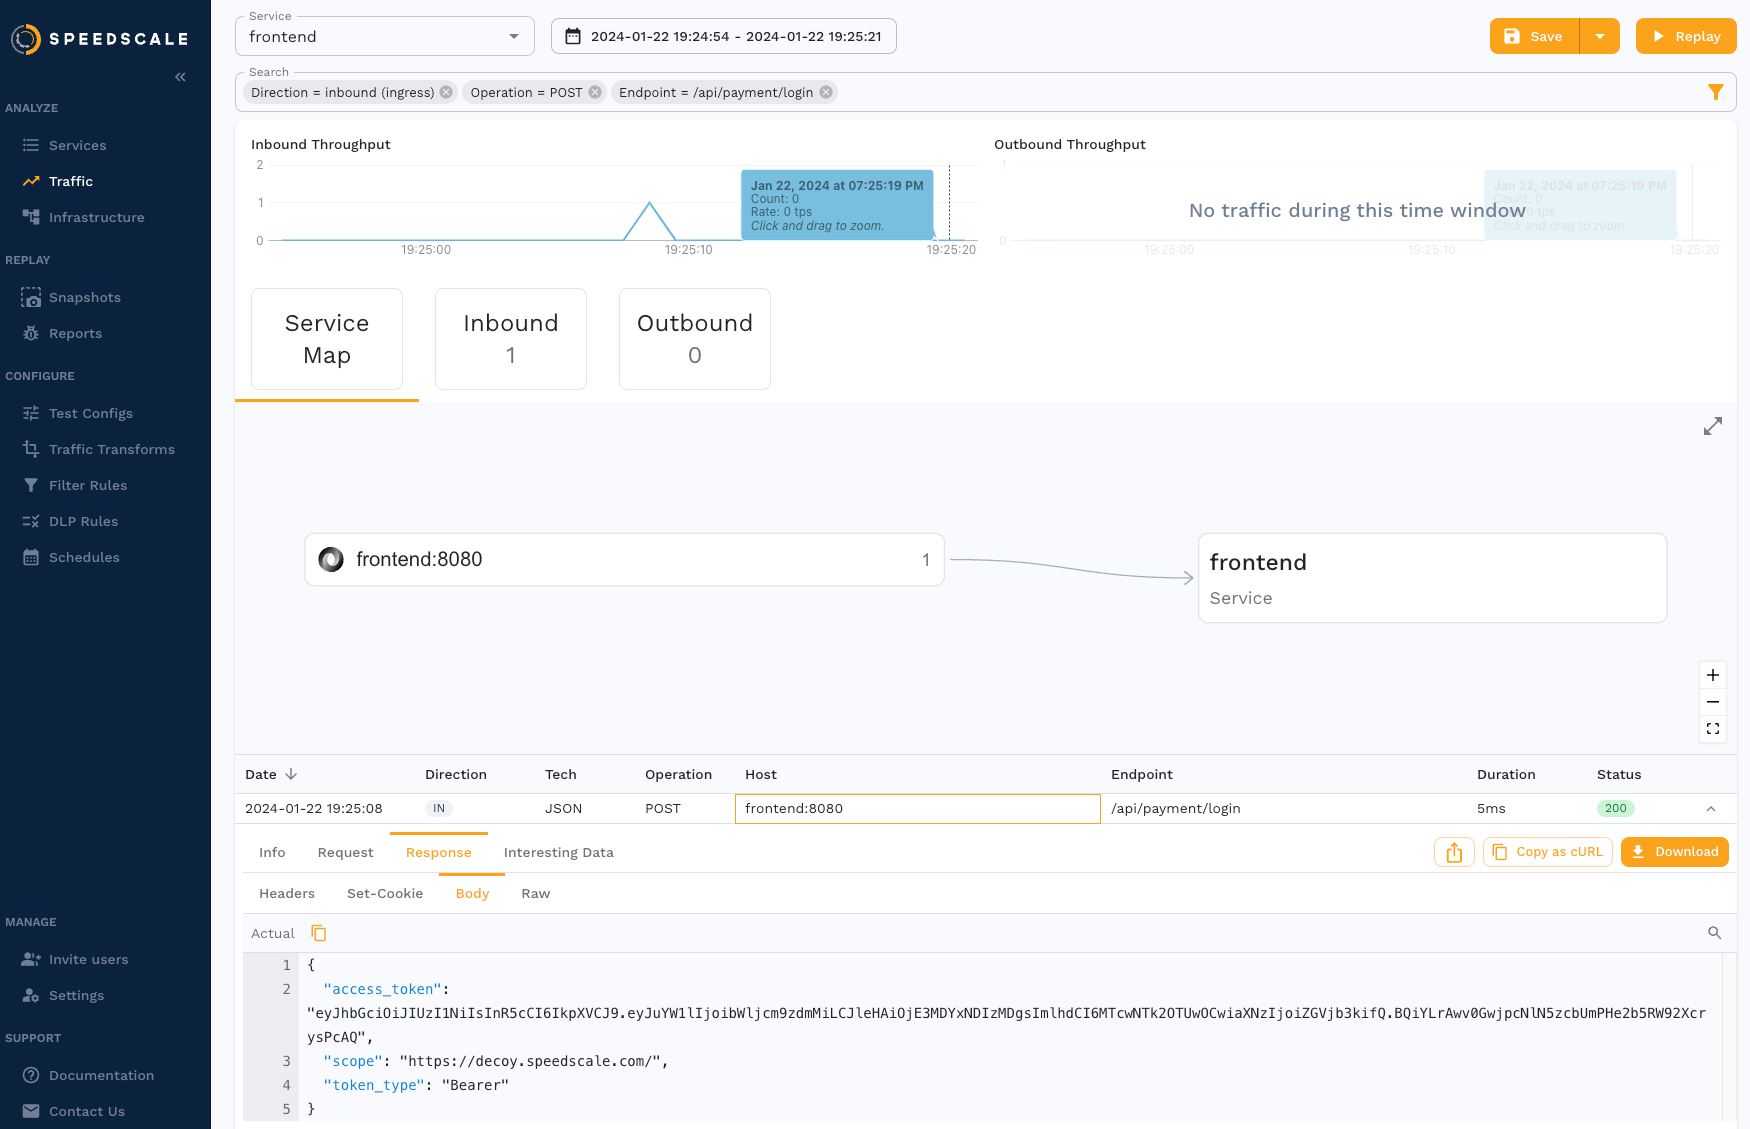
The first snapshot contains only the authentication request / response. Here the frontend service provides the authentication token we need.
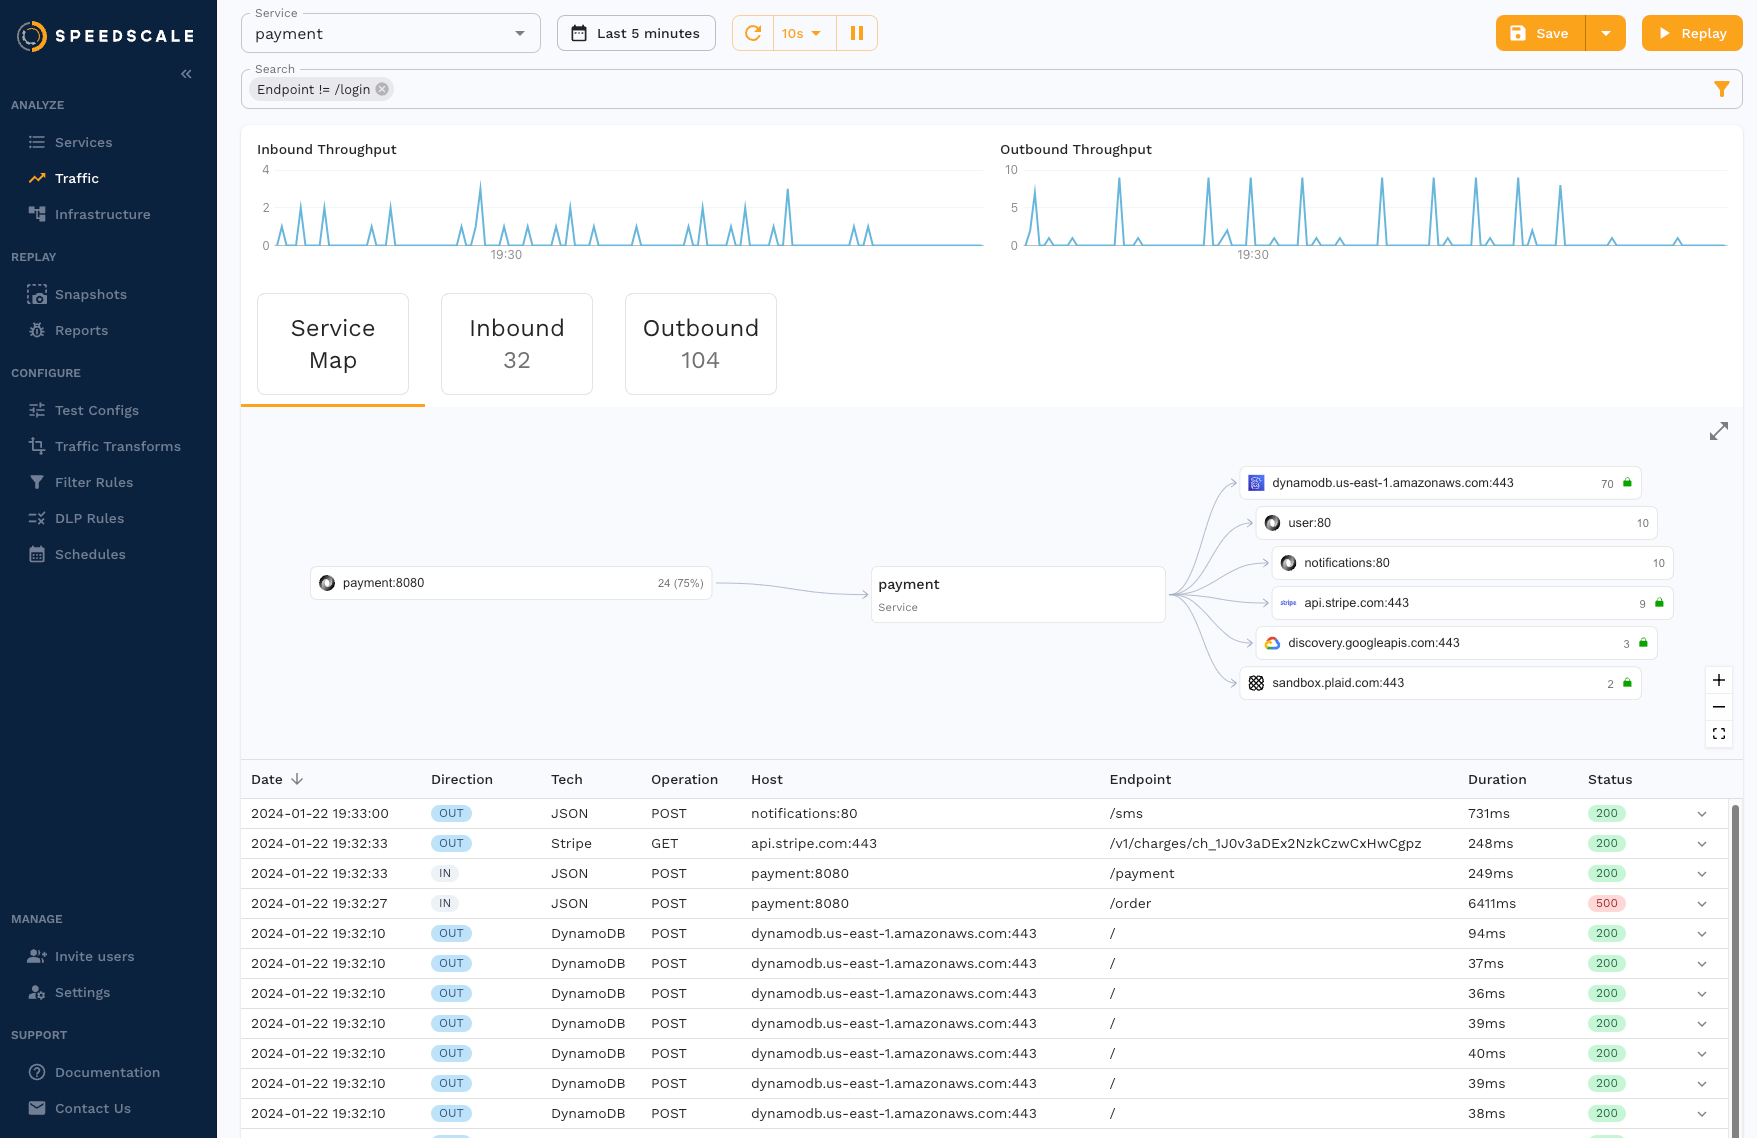
The second snapshot contains traffic to the API server we want to test, payment in this case.
Merge Snapshots
From the first snapshot containing the authentication request select the menu and choose "Append snapshot".
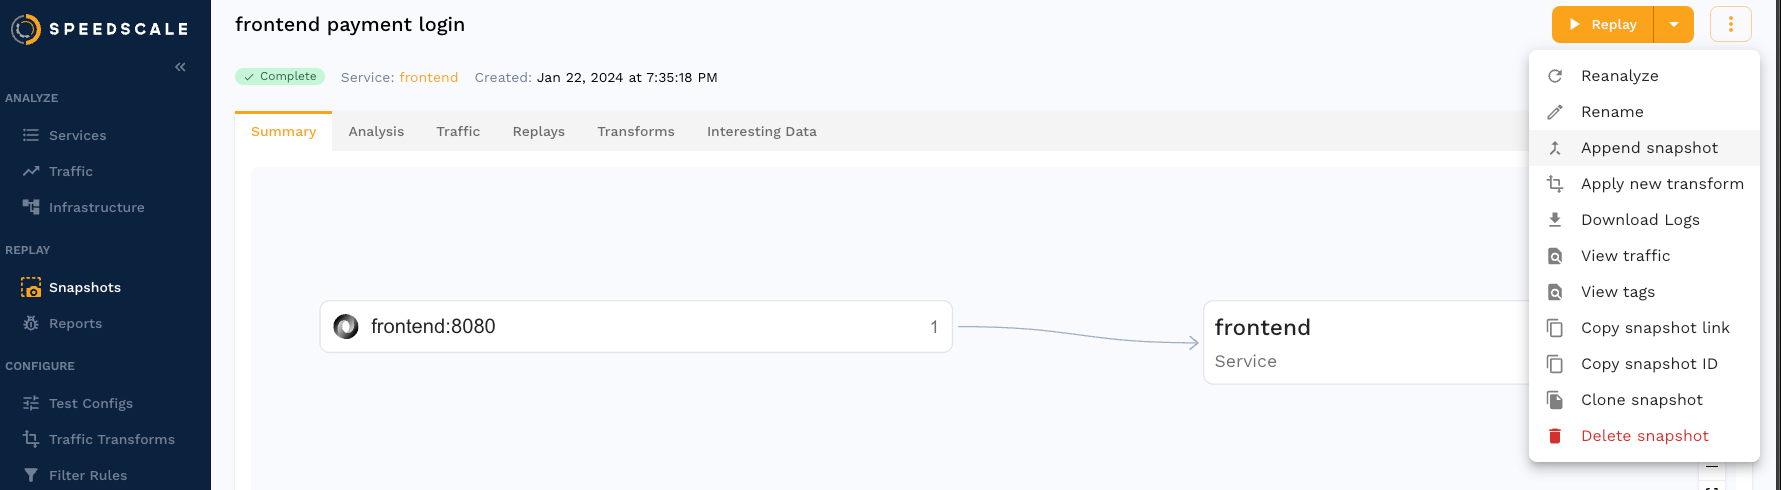
Then select the second snapshot.
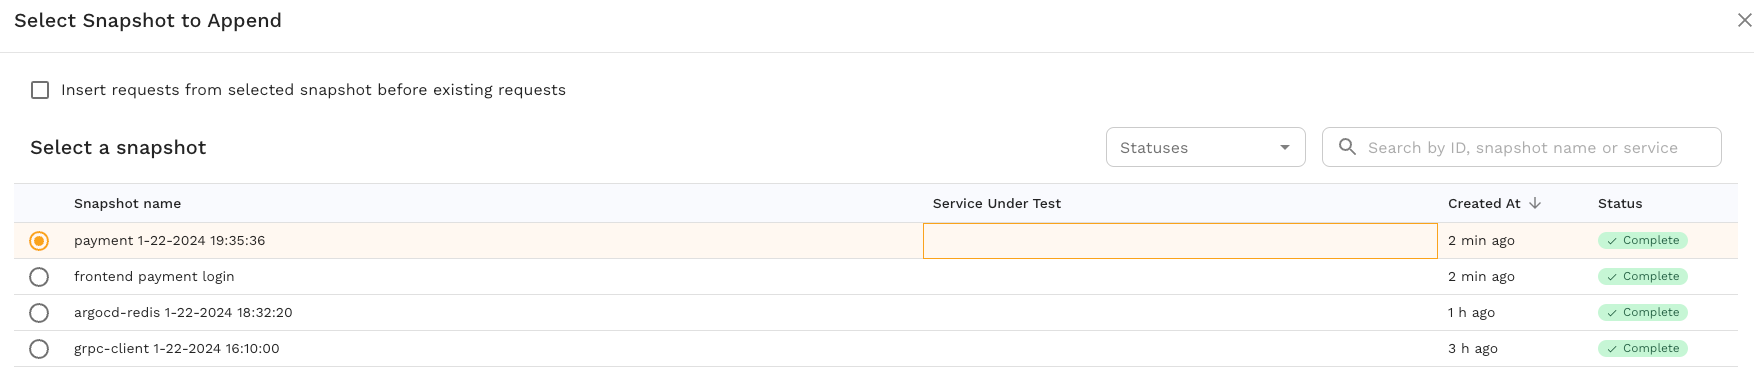
Now the first snapshot contains traffic from both services.
Just to be sure we can investigate the snapshot traffic to verify by pulling the snapshot files and looking at the resource fields in the action file:
$ speedctl pull snapshot $SNAPSHOT_ID
$ cat ~/.speedscale/data/snapshots/$SNAPSHOT_ID/raw.jsonl | head -n 5 | jq '.resource'
"frontend"
"payment"
"payment"
"payment"
"payment"
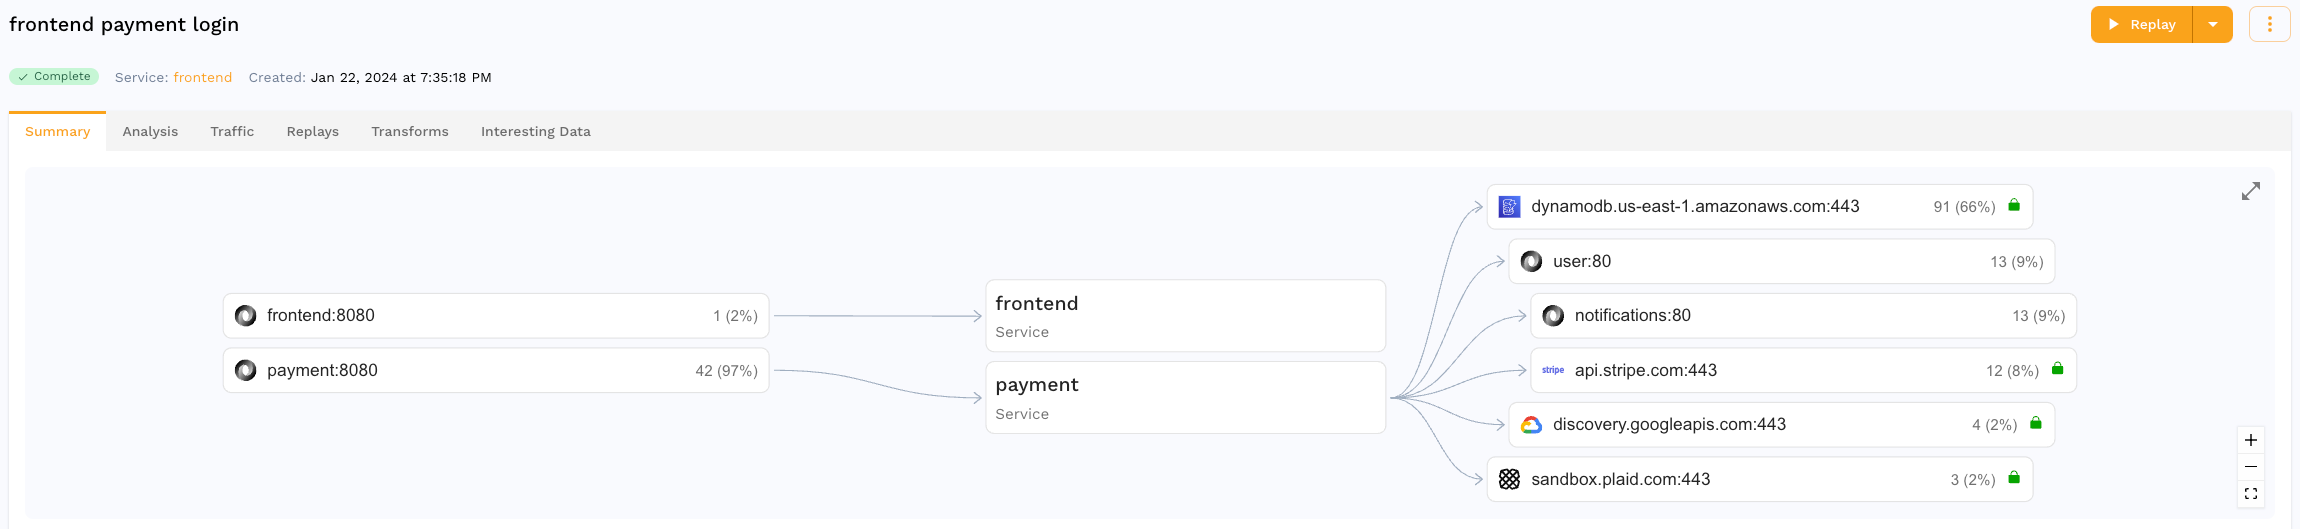
The first request is from frontend and the rest are from payment. The new snapshot shows the inbound and outbound traffic from both services.
Transforms
The snapshot now contains the /api/payment/login request, which means that request will be made again during the replay to retrieve a new token, but this is not enough. We need to configure Speedscale to pass the access_token from the auth response to the X-Access-Token header in subsequent requests.
We will create Transforms to store the access_token from the auth response body and load it into the header field later. Transforms can be created for the snapshot under the transforms tab.
Store the access token by selecting the /api/payment/login RRPair and clicking the pencil by the access_token field.
![]()
Select Store Variable to store and enter a variable name.
![]()
Now we can manually create a new transform by clicking Add at the top of the page. The new transforms will:
- Match all requests EXCEPT those with endpoint
/api/payment/login - Target the HTTP Request Header
X-Access-Token - Load the variable
access_tokeninto the header field at index 1, since the full header string isBearer [token]
![]()
Now during replay the X-Access-Token header for all requests, save the first one, will contain the access_token from the response of the /api/payment/login request which gives us the flexibility to test with our real service with real, valid authentication.
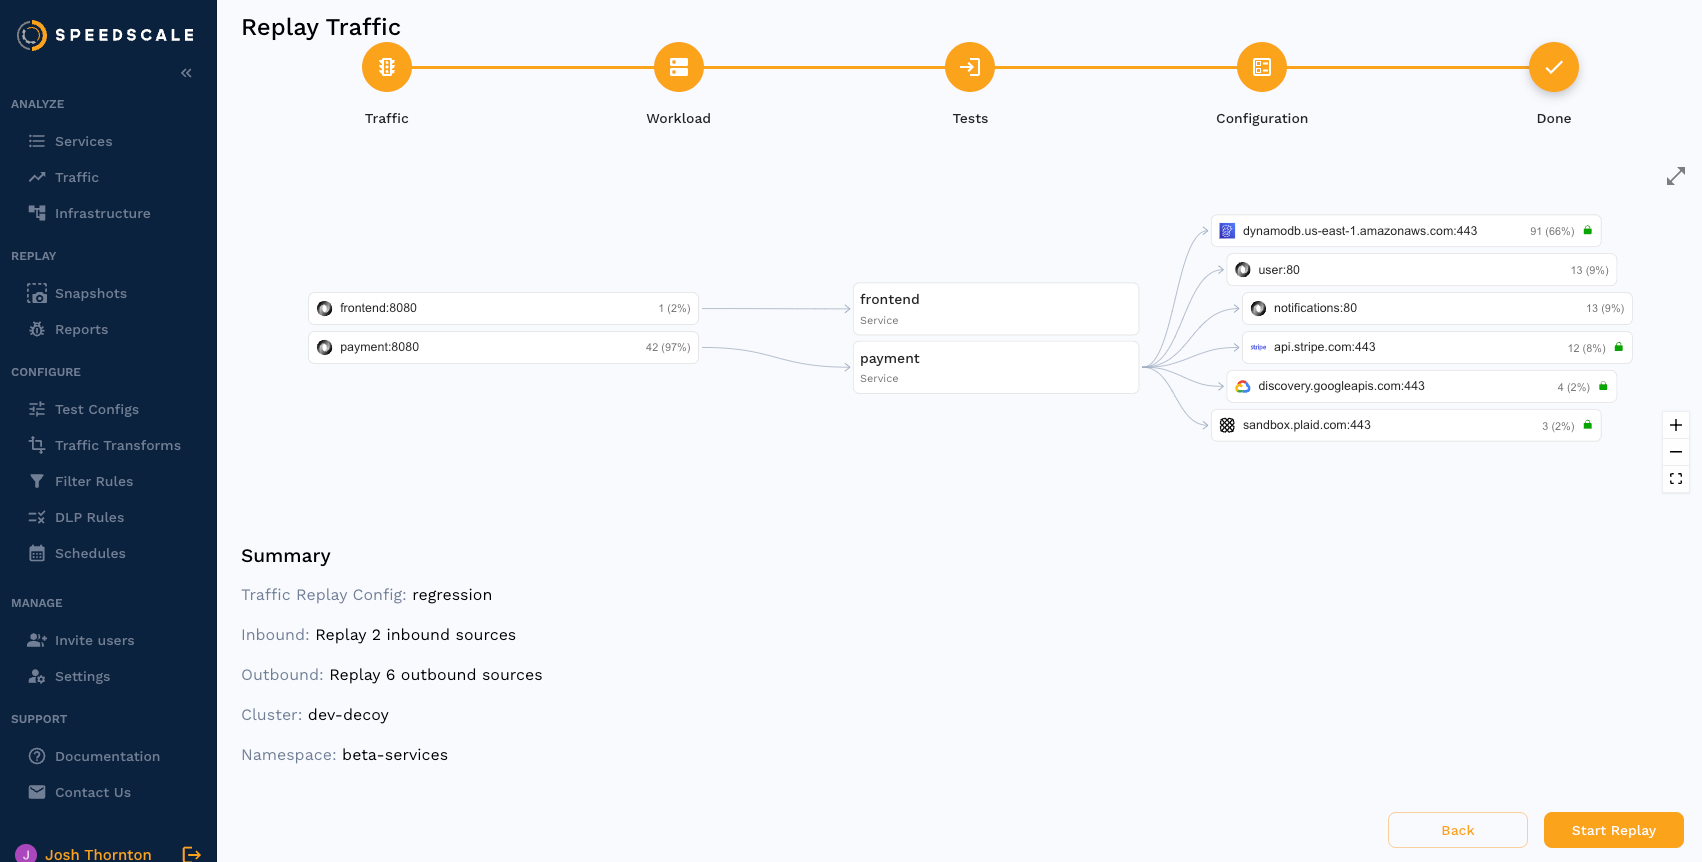
Replay
The merged snapshot now has traffic from both services and transforms to route to different locations. Let's replay it by clicking the Replay button.
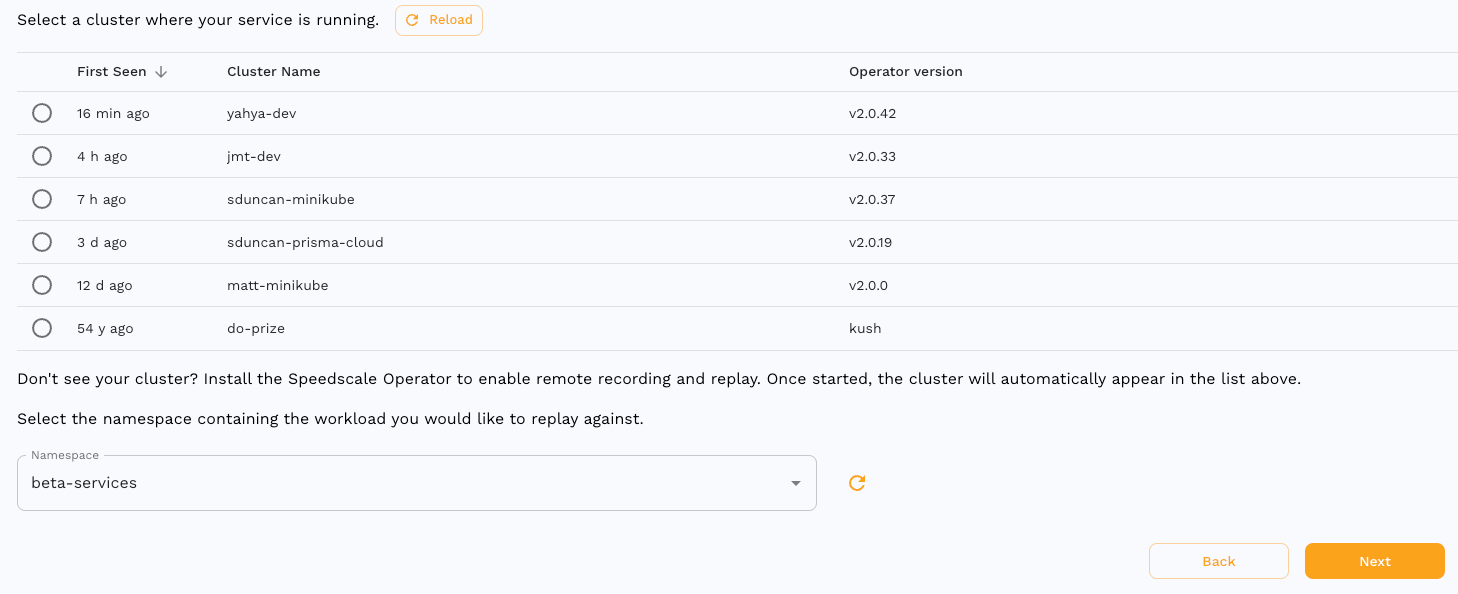
Cluster / Namespace
Use the replay wizard to select the cluster and namespace where the replay will run.
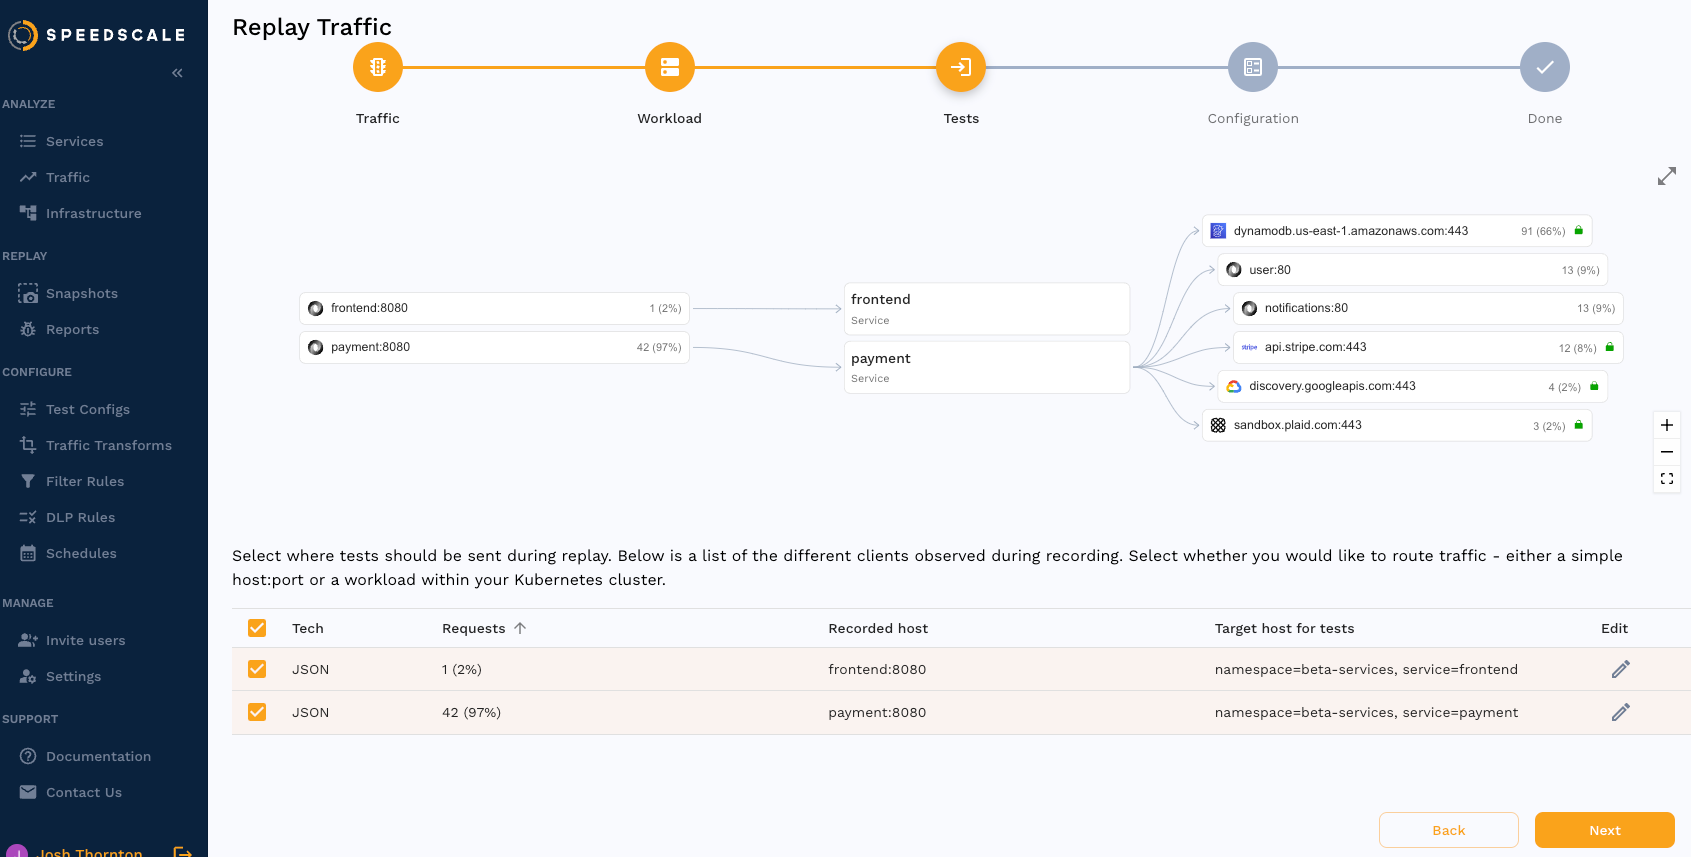
Tests
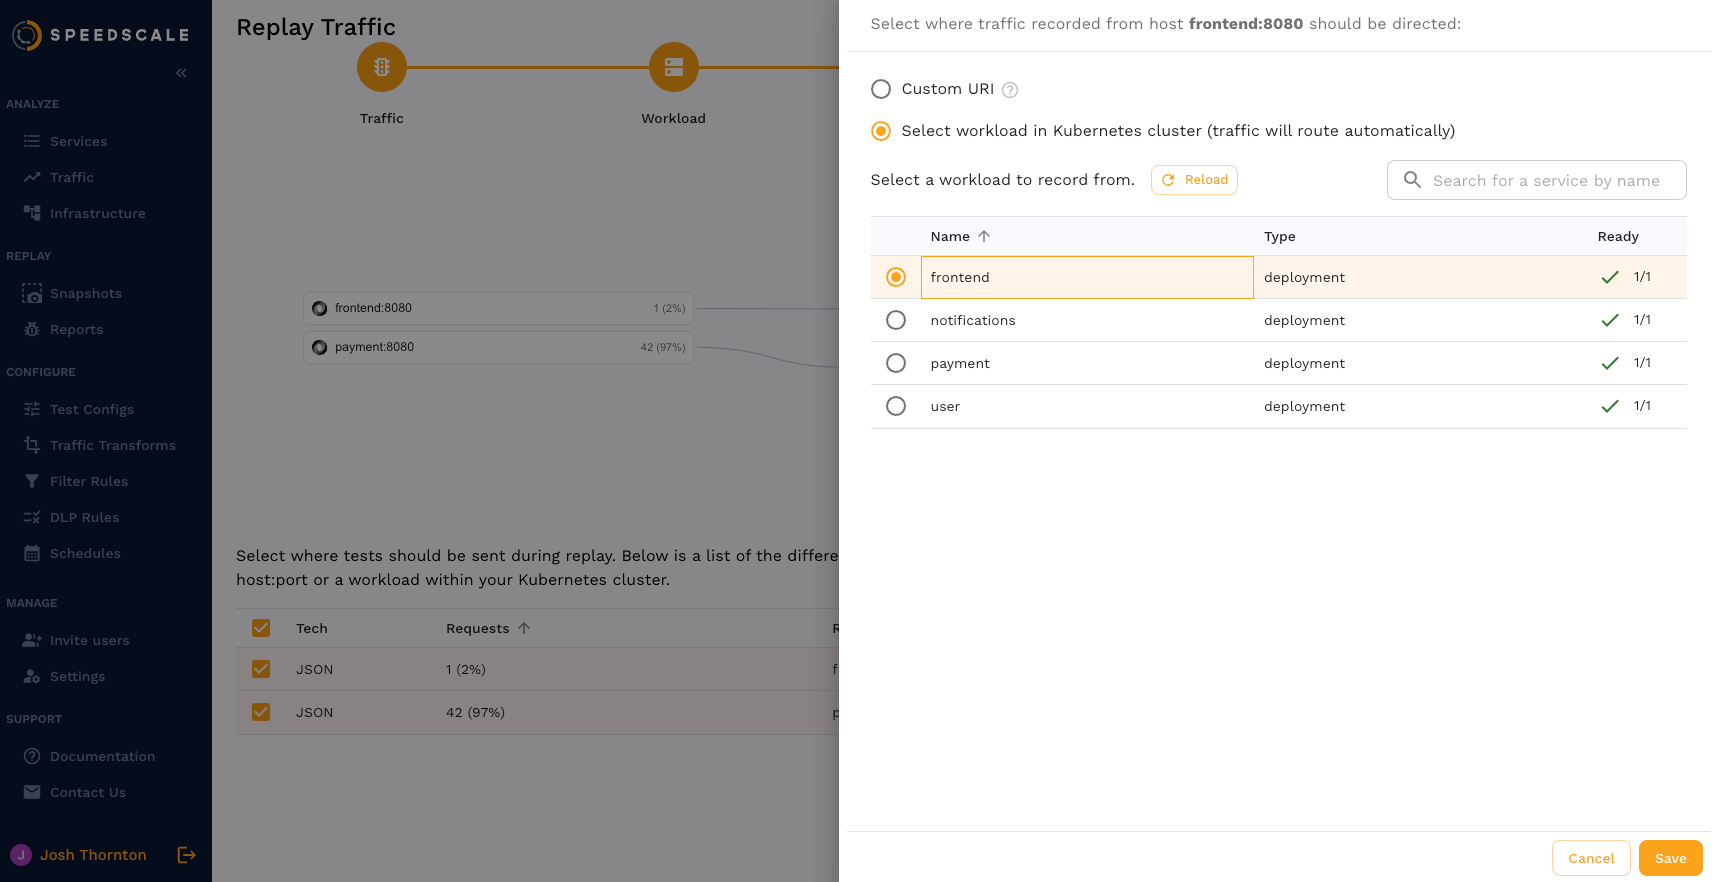
The "Tests" page shows the service map at the top and recorded traffic at the bottom. The traffic for each service is shown on the left side of the service map and may be configured separately. We will click the pencil to edit and select the workload where recorded frontend app traffic will be sent.
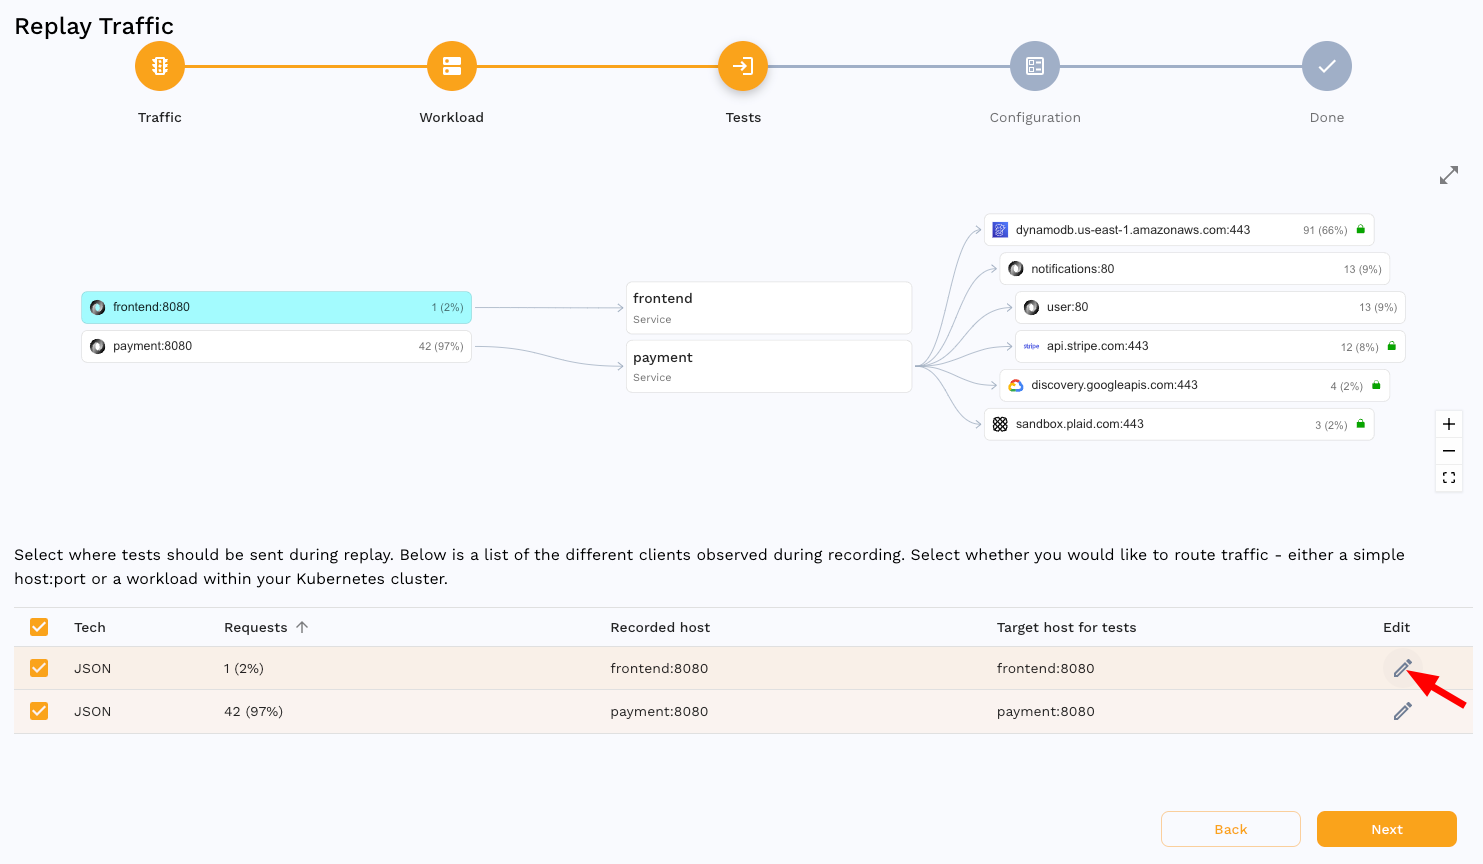
Here we are selecting the frontend workload.
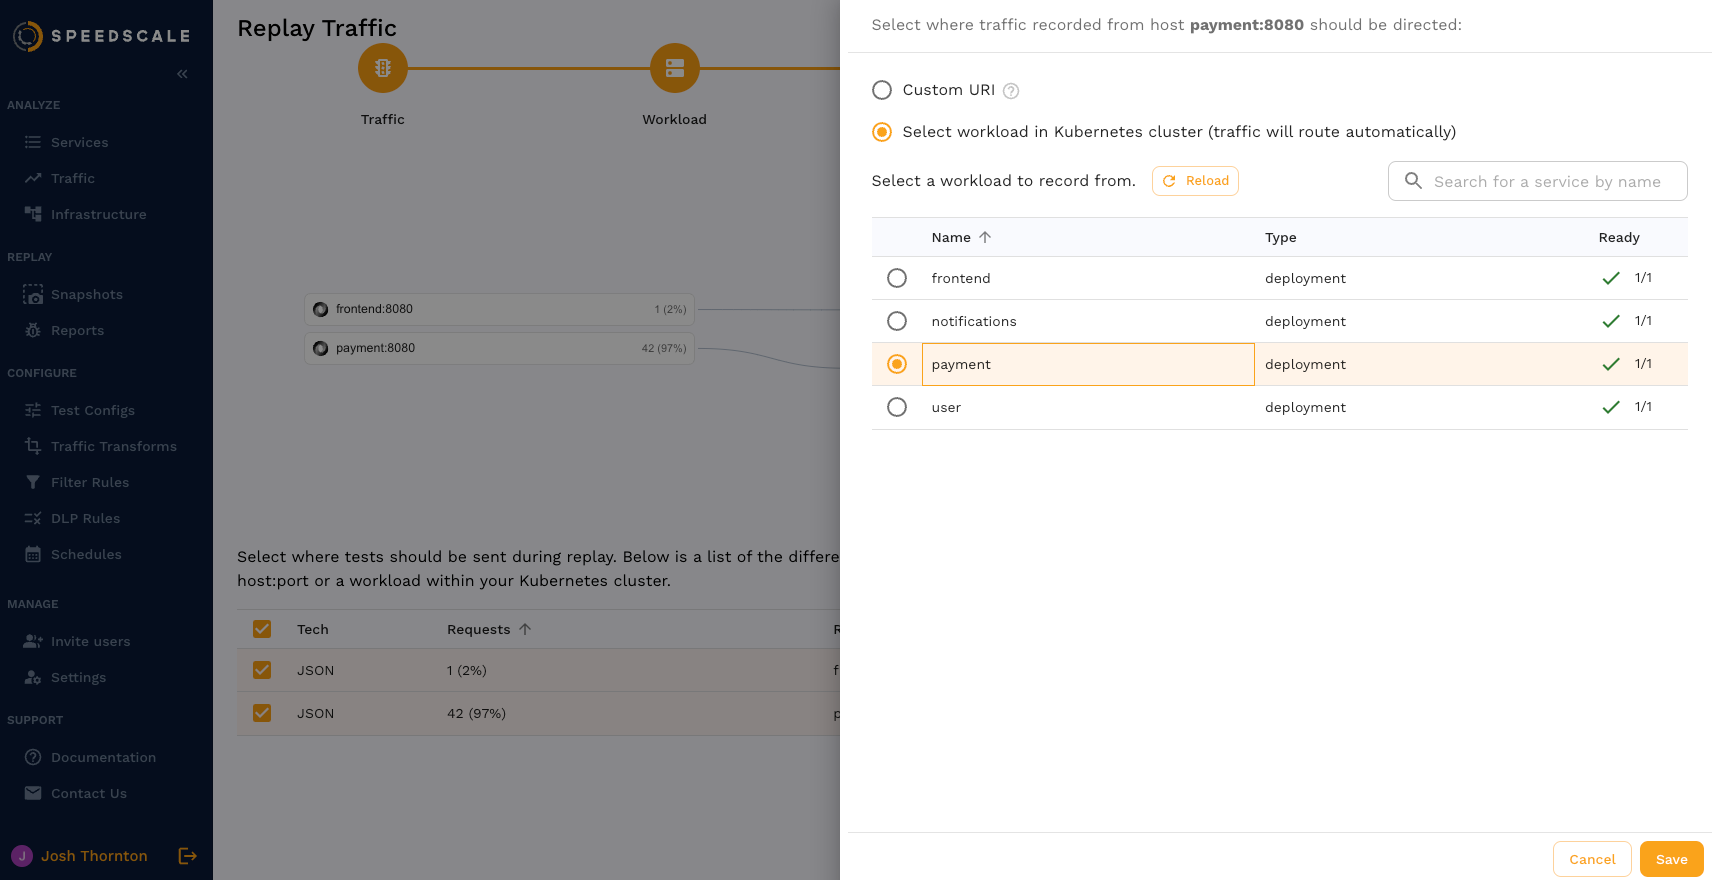
And similarly we can configure recorded payment app traffic to go to the payment workload.
The replay has been configured such that frontend app traffic will go to the frontend workload and payment app traffic will go to the payment workload.
Test Config
The test config is used to configure additional details like load and duration. Test configs can be modified under the Test Configs tab. Select an existing config.

Summary
Review the details of the replay and click Start Replay to begin.