Quick Start
For local development and testing without a cloud cluster, use proxymock to run a local mock server and generate tests from your traffic. See Local Development – Getting Started to install proxymock and get started in about 30 seconds.
- Local-first: proxymock keeps recording local by default for desktop workflows. See Data and Privacy.
- Enterprise isolation: use Bring Your Own Cloud (BYOC) when data residency and cloud boundary control are required.
- Sensitive data controls: enable DLP so sensitive fields are redacted before data leaves your network.
This guide walks through installing Speedscale into a new environment. After completing these steps the Speedscale Operator will be installed in your cluster and you should continue on to the tutorial to record, replay and view results for a demo application.
For Kubernetes traffic collection, start with the eBPF collector. If your environment cannot run eBPF, use goproxy sidecars instead.
Speedscale is tested with apps hosted on the local desktop all the way up to high scale enterprise Kubernetes clusters. If this is your first time working with Speedscale, it's easiest to just run on your local desktop and record traffic from a local process. Keep in mind that it is very common to record traffic in one environment (like a production Kubernetes cluster) and replay it somewhere else (like a local mock server).
This guide will walk you through the following steps:
- Retrieve your API Key
- Install CLI (recommended)
- Install Operator (if required)
- Verify Installation
- Capture and replay traffic against a demo app
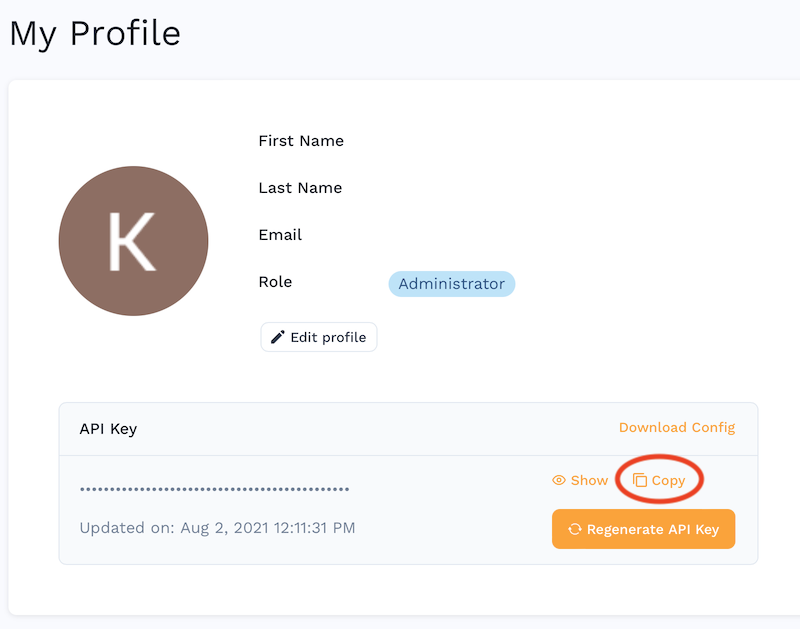
Retrieve your API Key
You will need to get your personal API key from your Profile Page. Copy the API key and paste when prompted.
Install CLI (optional)
If you are running Speedscale on a local desktop or in Docker Desktop, the CLI is required. For all other users it is highly recommended because it allows programmatic interaction with Speedscale cloud.
- MacOS
- Linux
- Windows
Start by installing the Speedscale CLI-based API (speedctl) via Homebrew:
brew install speedscale/tap/speedctl
Or via the install script:
sh -c "$(curl -Lfs https://downloads.speedscale.com/speedctl/install)"
You can inspect the install script to see what it does. Root permission is not required to execute this script.
Install a specific version by passing it to the install script:
sh -c "$(curl -Lfs https://downloads.speedscale.com/speedctl/install)" -s v2.3.86
To install non interactively (like in CI/CD) set the SPEEDSCALE_API_KEY environment variable to your API key
Optionally skip the install script and install manually:
# Download speedctl binary on your machine
curl "https://downloads.speedscale.com/speedctl/speedctl-darwin-$(case $(uname -m) in x86_64) echo 'amd64';; arm | arm64 | aarch64) echo 'arm64';; esac)" -o speedctl

# Create speedscale directory and move the binary to the directory
mkdir ~/.speedscale
mv ./speedctl ~/.speedscale

# Give execute permission to the binary
chmod +x ~/.speedscale/speedctl
Don't forget to add speedctl to your $PATH variable in your shell's rcfile:
# substitute your shell's rcfile
echo "export PATH=\$PATH:$HOME/.speedscale" >> ~/.zshrc
Linux users should install the CLI via the install script:
sh -c "$(curl -Lfs https://downloads.speedscale.com/speedctl/install)"
You can inspect the install script to see what it does. Root permission is not required to execute this script.
Install a specific version by passing it to the install script:
sh -c "$(curl -Lfs https://downloads.speedscale.com/speedctl/install)" -s v2.3.86
To install non interactively (like in CI/CD) set the SPEEDSCALE_API_KEY environment variable to your API key
Optionally skip the install script and install manually:
# Download speedctl binary on your machine
curl "https://downloads.speedscale.com/speedctl/speedctl-linux-$(case $(uname -m) in x86_64) echo 'amd64';; arm | arm64 | aarch64) echo 'arm64';; esac)" -o speedctl

# Create speedscale directory and move the binary to the directory
mkdir ~/.speedscale
mv ./speedctl ~/.speedscale

# Give execute permission to the binary
chmod +x ~/.speedscale/speedctl
Don't forget to add speedctl to your $PATH variable in your shell's rcfile:
# substitute your shell's rcfile
echo "export PATH=\$PATH:$HOME/.speedscale" >> ~/.zshrc
Open PowerShell and create a Speedscale directory.
mkdir -f $env:userprofile\.speedscale
Download speedctl into the Speedscale directory.
curl.exe -L "https://downloads.speedscale.com/speedctl/speedctl.exe" -o $env:userprofile\.speedscale\speedctl.exe
If this is your first time using speedctl you may need to add the Speedscale
directory to your Path environment variable so it is accessible without knowing
the full path.
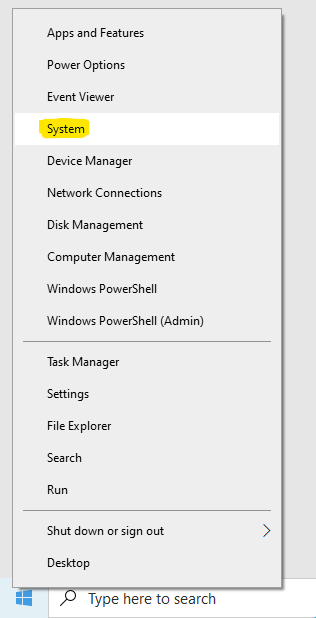
To add the Speedscale directory to your path, right click on the Windows button and click System.
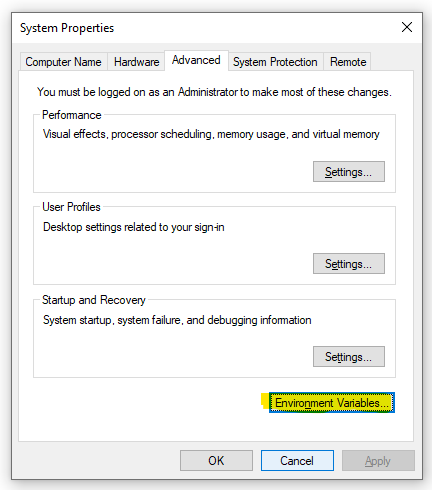
Click Advanced system settings on the right.

Click Environment Variables.
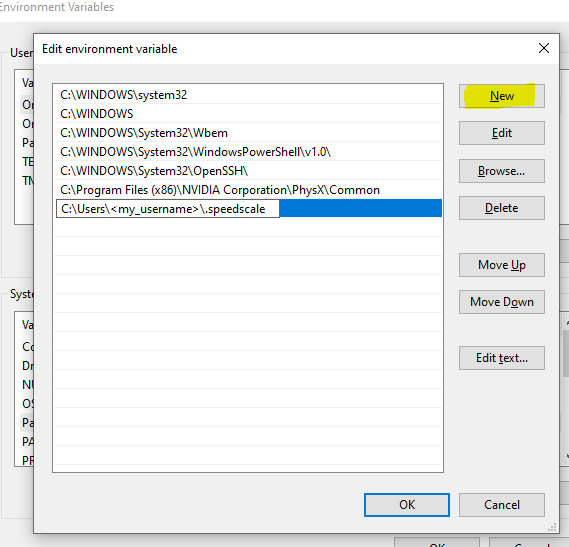
Under System variables select Path and click Edit.
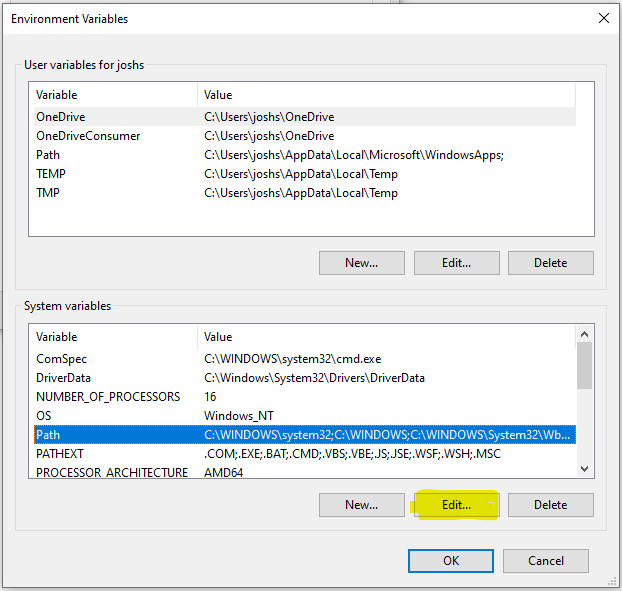
Create a New entry in the list with the Speedscale directory. If you are unsure of the exact path run this command from PowerShell.
echo $env:userprofile\.speedscale
Click OK and restart PowerShell.
Install Speedscale Operator (optional)
If you are running Speedscale on your local desktop, you should continue directly to the tutorial. The rest of this document is focused on installing a Kubernetes-based demo.
If you are using a common Kubernetes distribution (EKS, GKE, minikube, etc) then you can install using these instructions. If you are not running in Kubernetes, or are running with a more specialized enterprise distribution please select environment-specific instructions in this section.
- Helm
- CLI (Mac/Linux)
- CLI (Windows)
- ArgoCD
- GitOps
Make sure you have Helm 3 installed. Then,
helm repo add speedscale https://speedscale.github.io/operator-helm/
helm repo update
helm install speedscale-operator speedscale/speedscale-operator \
	-n speedscale \
	--create-namespace \
	--set apiKey=<YOUR-SPEEDSCALE-API-KEY> \
	--set clusterName=<YOUR-CLUSTER-NAME>
Navigate to the Helm repository for all configuration options available for the Helm chart.
Run speedctl install, choose "Kubernetes" and follow the prompts.
The install wizard will walk you through installing the Speedscale Kubernetes Operator.
Recommended next step: enable the eBPF collector to capture traffic in Kubernetes without proxies or app changes. If your environment or workload cannot use eBPF, fall back to the Sidecar installation.
(Optional) Adding Image Pull Secrets
If you need custom image pull secrets (for example, if you're re-hosting
Speedscale images in a dedicated registry), you may provide one or more secret
names with the --imgpullsecrets argument, and the secrets will be attached to
the service account.
speedctl install --imgpullsecrets my-secret1,my-secret2p
If using Kubernetes run speedctl install, choose "Kubernetes" and follow the prompts.
The install wizard will walk you through installing the
Speedscale Kubernetes Operator.
Recommended next step: enable the eBPF collector to capture traffic in Kubernetes. If eBPF is not suitable for your workload or kernel, use the Sidecar installation instead.
Use the following ArgoCD manifest as an example. Make sure to use the latest targetRevision as shown on the Helm repository.
project: default
source:
  repoURL: 'https://speedscale.github.io/operator-helm/'
  targetRevision: <YOUR-VERSION>
  helm:
    parameters:
      - name: apiKeySecret
        value: speedscale-apikey
    values: |-
      apiKeySecret: speedscale-apikey
      clusterName: <YOUR-CLUSTER-NAME>
  chart: speedscale-operator
destination:
  namespace: speedscale
  name: in-cluster
syncPolicy:
  automated: {}
  syncOptions:
    - CreateNamespace=true
Installing via helm install is preferred as different GitOps engines treat Helm charts differently and Helm guarantees an order of operations during the install.
You can generate manifests either via Helm or our CLI.
helm template speedscale-operator speedscale/speedscale-operator \
	-n speedscale \
	--create-namespace \
	--set apiKey=<YOUR-SPEEDSCALE-API-KEY> \
	--set clusterName=<YOUR-CLUSTER-NAME> > ./speedscale-operator.yaml
Then store speedscale-operator.yaml in git so it is deployed to your cluster.
Verify Installation
Make sure the operator pods are running properly:
kubectl -n speedscale get pods
Note: The Operator will start at least 2 pods (the operator itself and the Speedscale Forwarder) after it starts. On your cluster the ids of the pods will be different.
NAME                                    READY   STATUS    RESTARTS   AGE
speedscale-forwarder-xxxxxxxxxx-xxxxx   1/1     Running   0          5s
speedscale-operator-xxxxxxxxxx-xxxxx    1/1     Running   0          15s
If you have any issues installing, check out the troubleshooting guide or contact support on slack
Next Steps
At this point Speedscale is present in your cluster and you are now ready to target workloads for record and playback. If this is your first installation please continue using our multi-platform tutorial for a full walkthrough.
If you're already an expert you can click the Add Service button in the UI to target workloads for capture. Prefer enabling the eBPF collector; if not possible, add sidecars manually.