Modifying Tests/Mocks
Use this guide to modify your tests or mock responses in an existing proxymock recording. Any modifications made will automatically show up the next time you run proxymock.
Before you begin
Make sure you have:
Editing raw files
RRPairs are plain markdown files, so you can edit them in any editor. Each recording is stored in its own directory under the proxymock parent directory. Modify the RRPair and save the file; the next time you run proxymock as a mock or test server the new data will be used.
For more information about the RRPair file format, check this link. For more information about how mock signatures are built from the raw traffic recording see this link.
Applying transforms in proxymock web
Raw-file edits change the recorded data in place. When you instead want to overlay a change at run time, such as swapping an expired token or masking a field, apply a transform from the request detail in proxymock web. Transforms are saved as blueprints and applied every time you run proxymock as a mock or test server; the recording itself is untouched.
Start the web UI from the parent of proxymock/:
proxymock web
Open a request in the Requests grid to see its RRPair detail, then add a transform to the field you want to change:
- Header or query field — in the Request or Response tab, hover the row and click the transform (wand) icon next to the value.
- Body field — open the Body tab and right-click the line you want, then choose Add transform….
Either opens a short menu of transforms — Replace with constant, Smart replace, Store in variable, and the rest of the transform library. Pick one, fill in any value it needs, and proxymock writes a rule into a blueprint named Field Transforms, scoped to that request's endpoint and method. The rule is active immediately and applies on your next run.
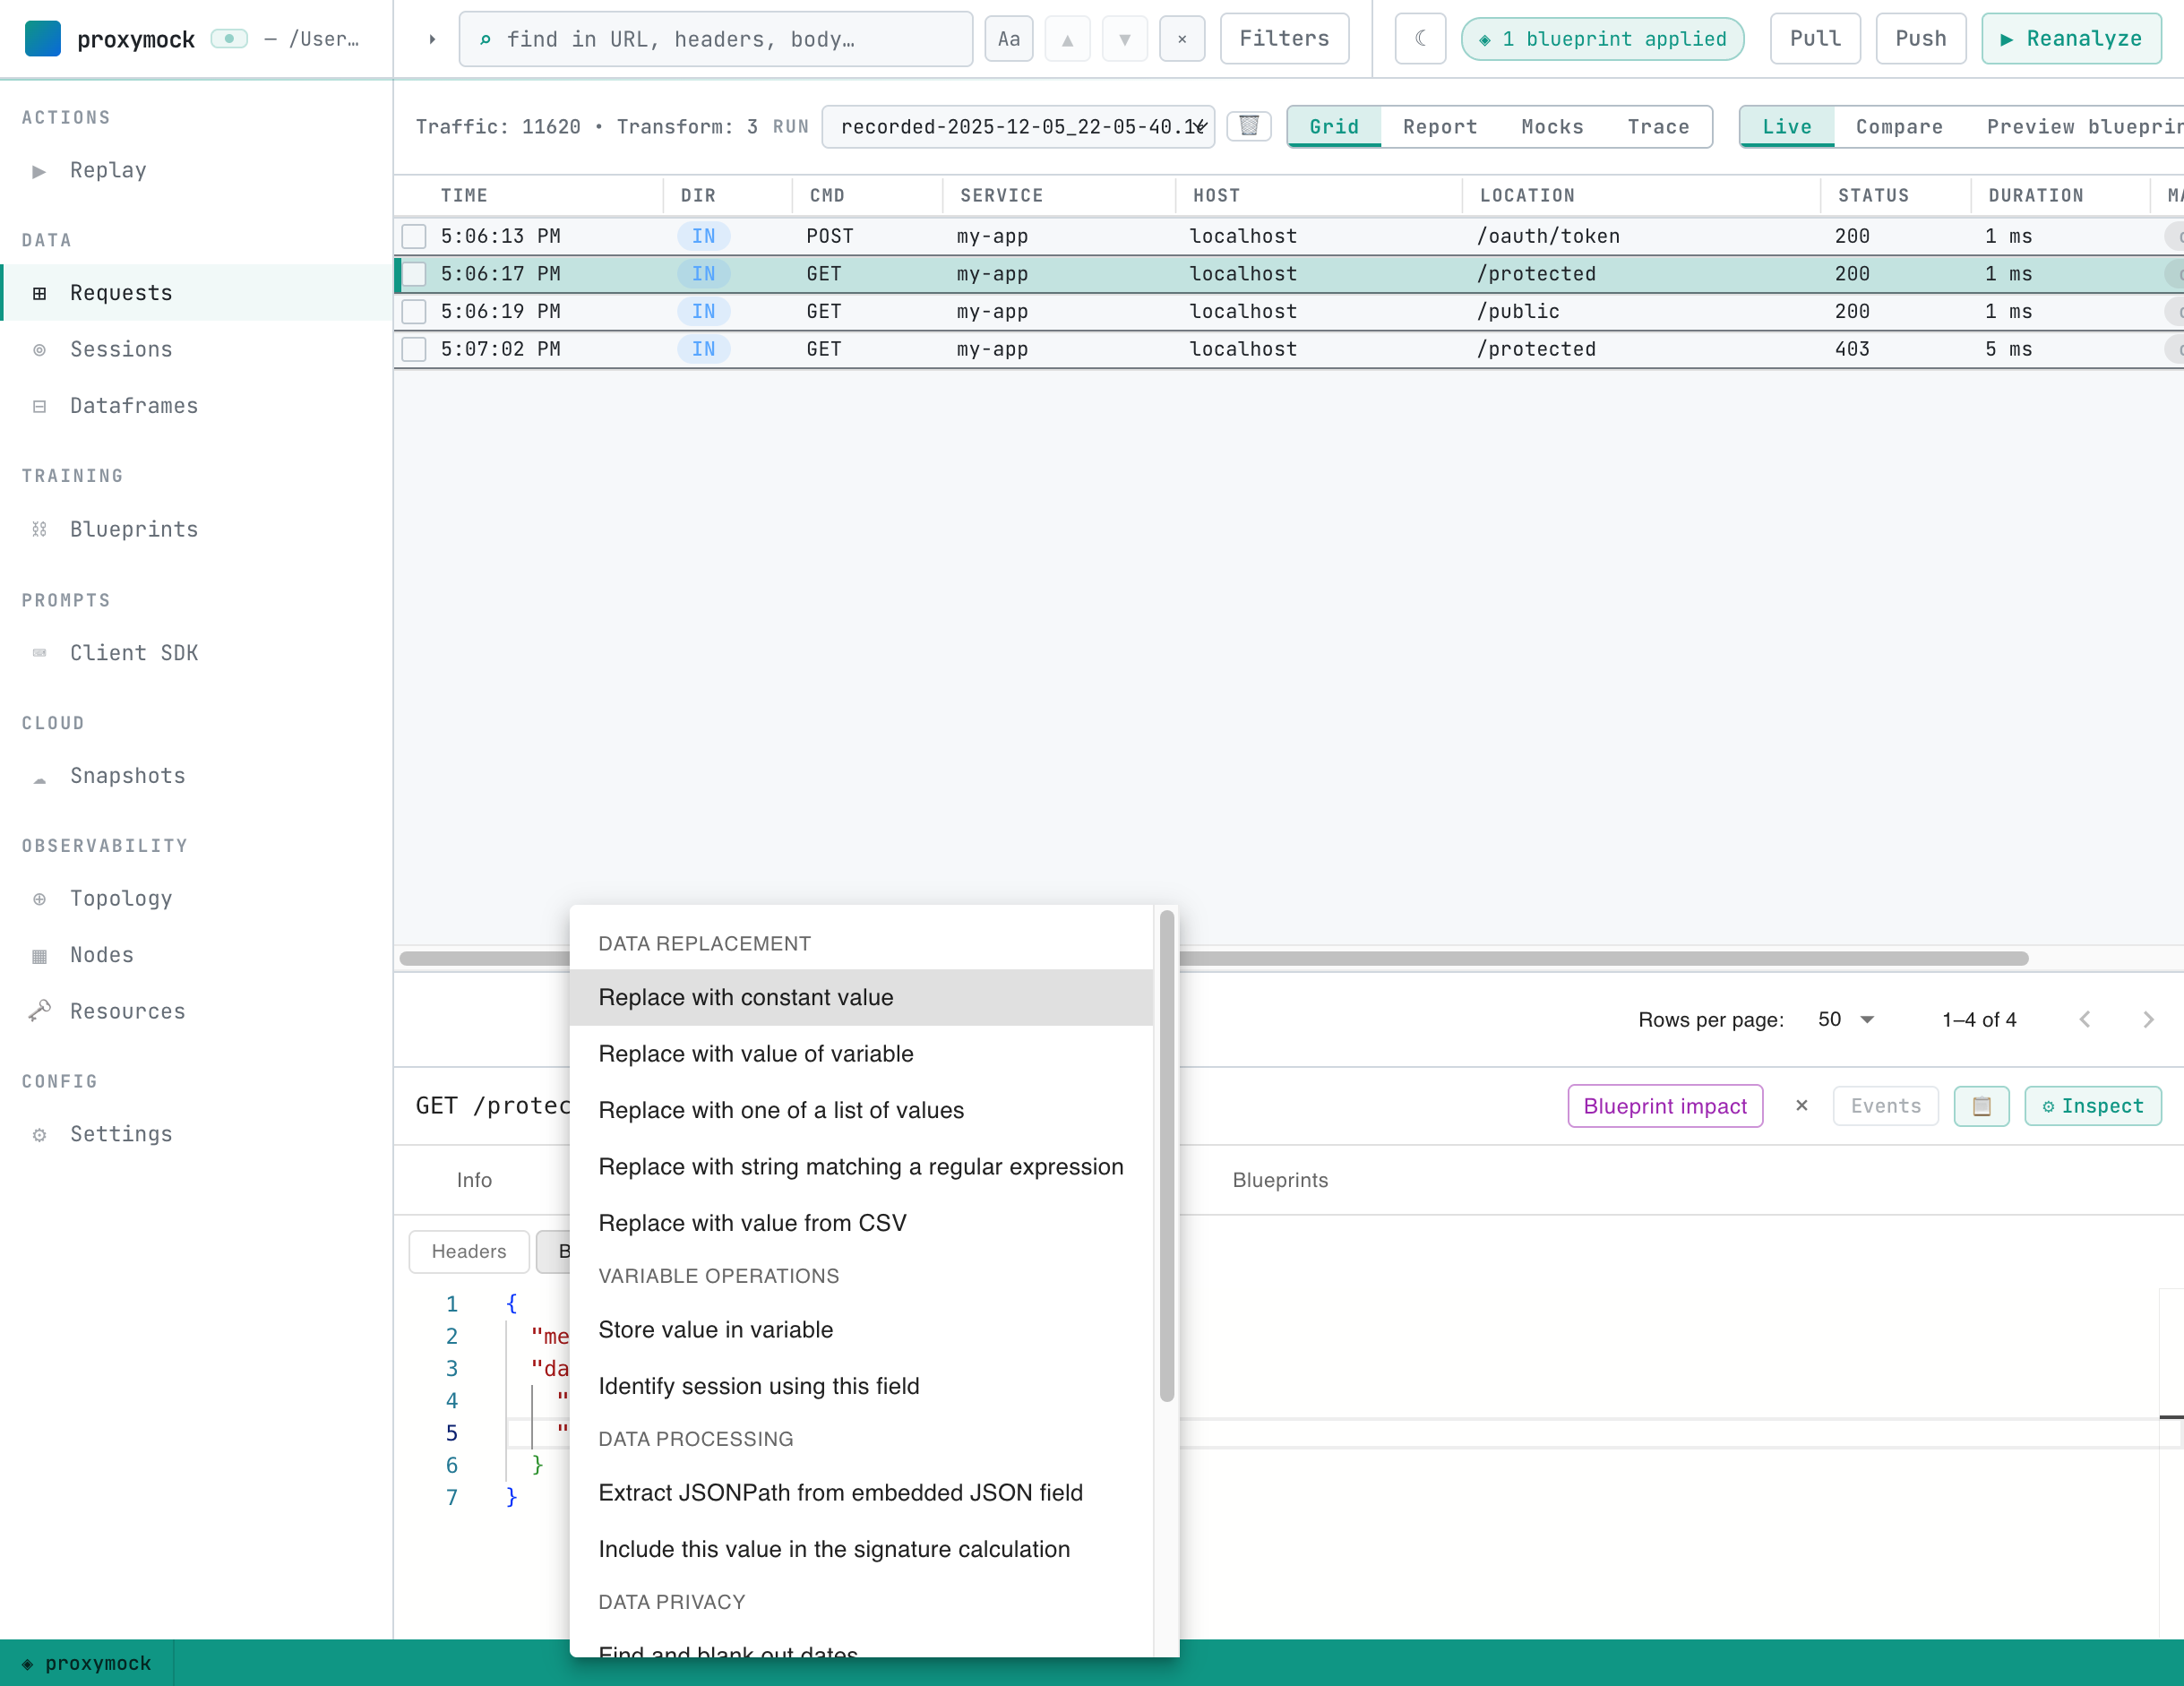
You can review and edit every rule in the Blueprints tab — the same place the recommendations workflow lands its rules.
Previewing blueprint impact
Before you replay, you can see exactly what the active blueprints will change. In the Requests grid, switch the lens to Preview blueprints. proxymock applies the blueprints to the current run's traffic in memory and shows a before/after diff of every request they touch — no replay required.
The card above the grid steps through each change one at a time. Use ‹ / › to walk them: each step opens the affected request, names the field and the rule that changes it, and highlights the change in the before/after view.
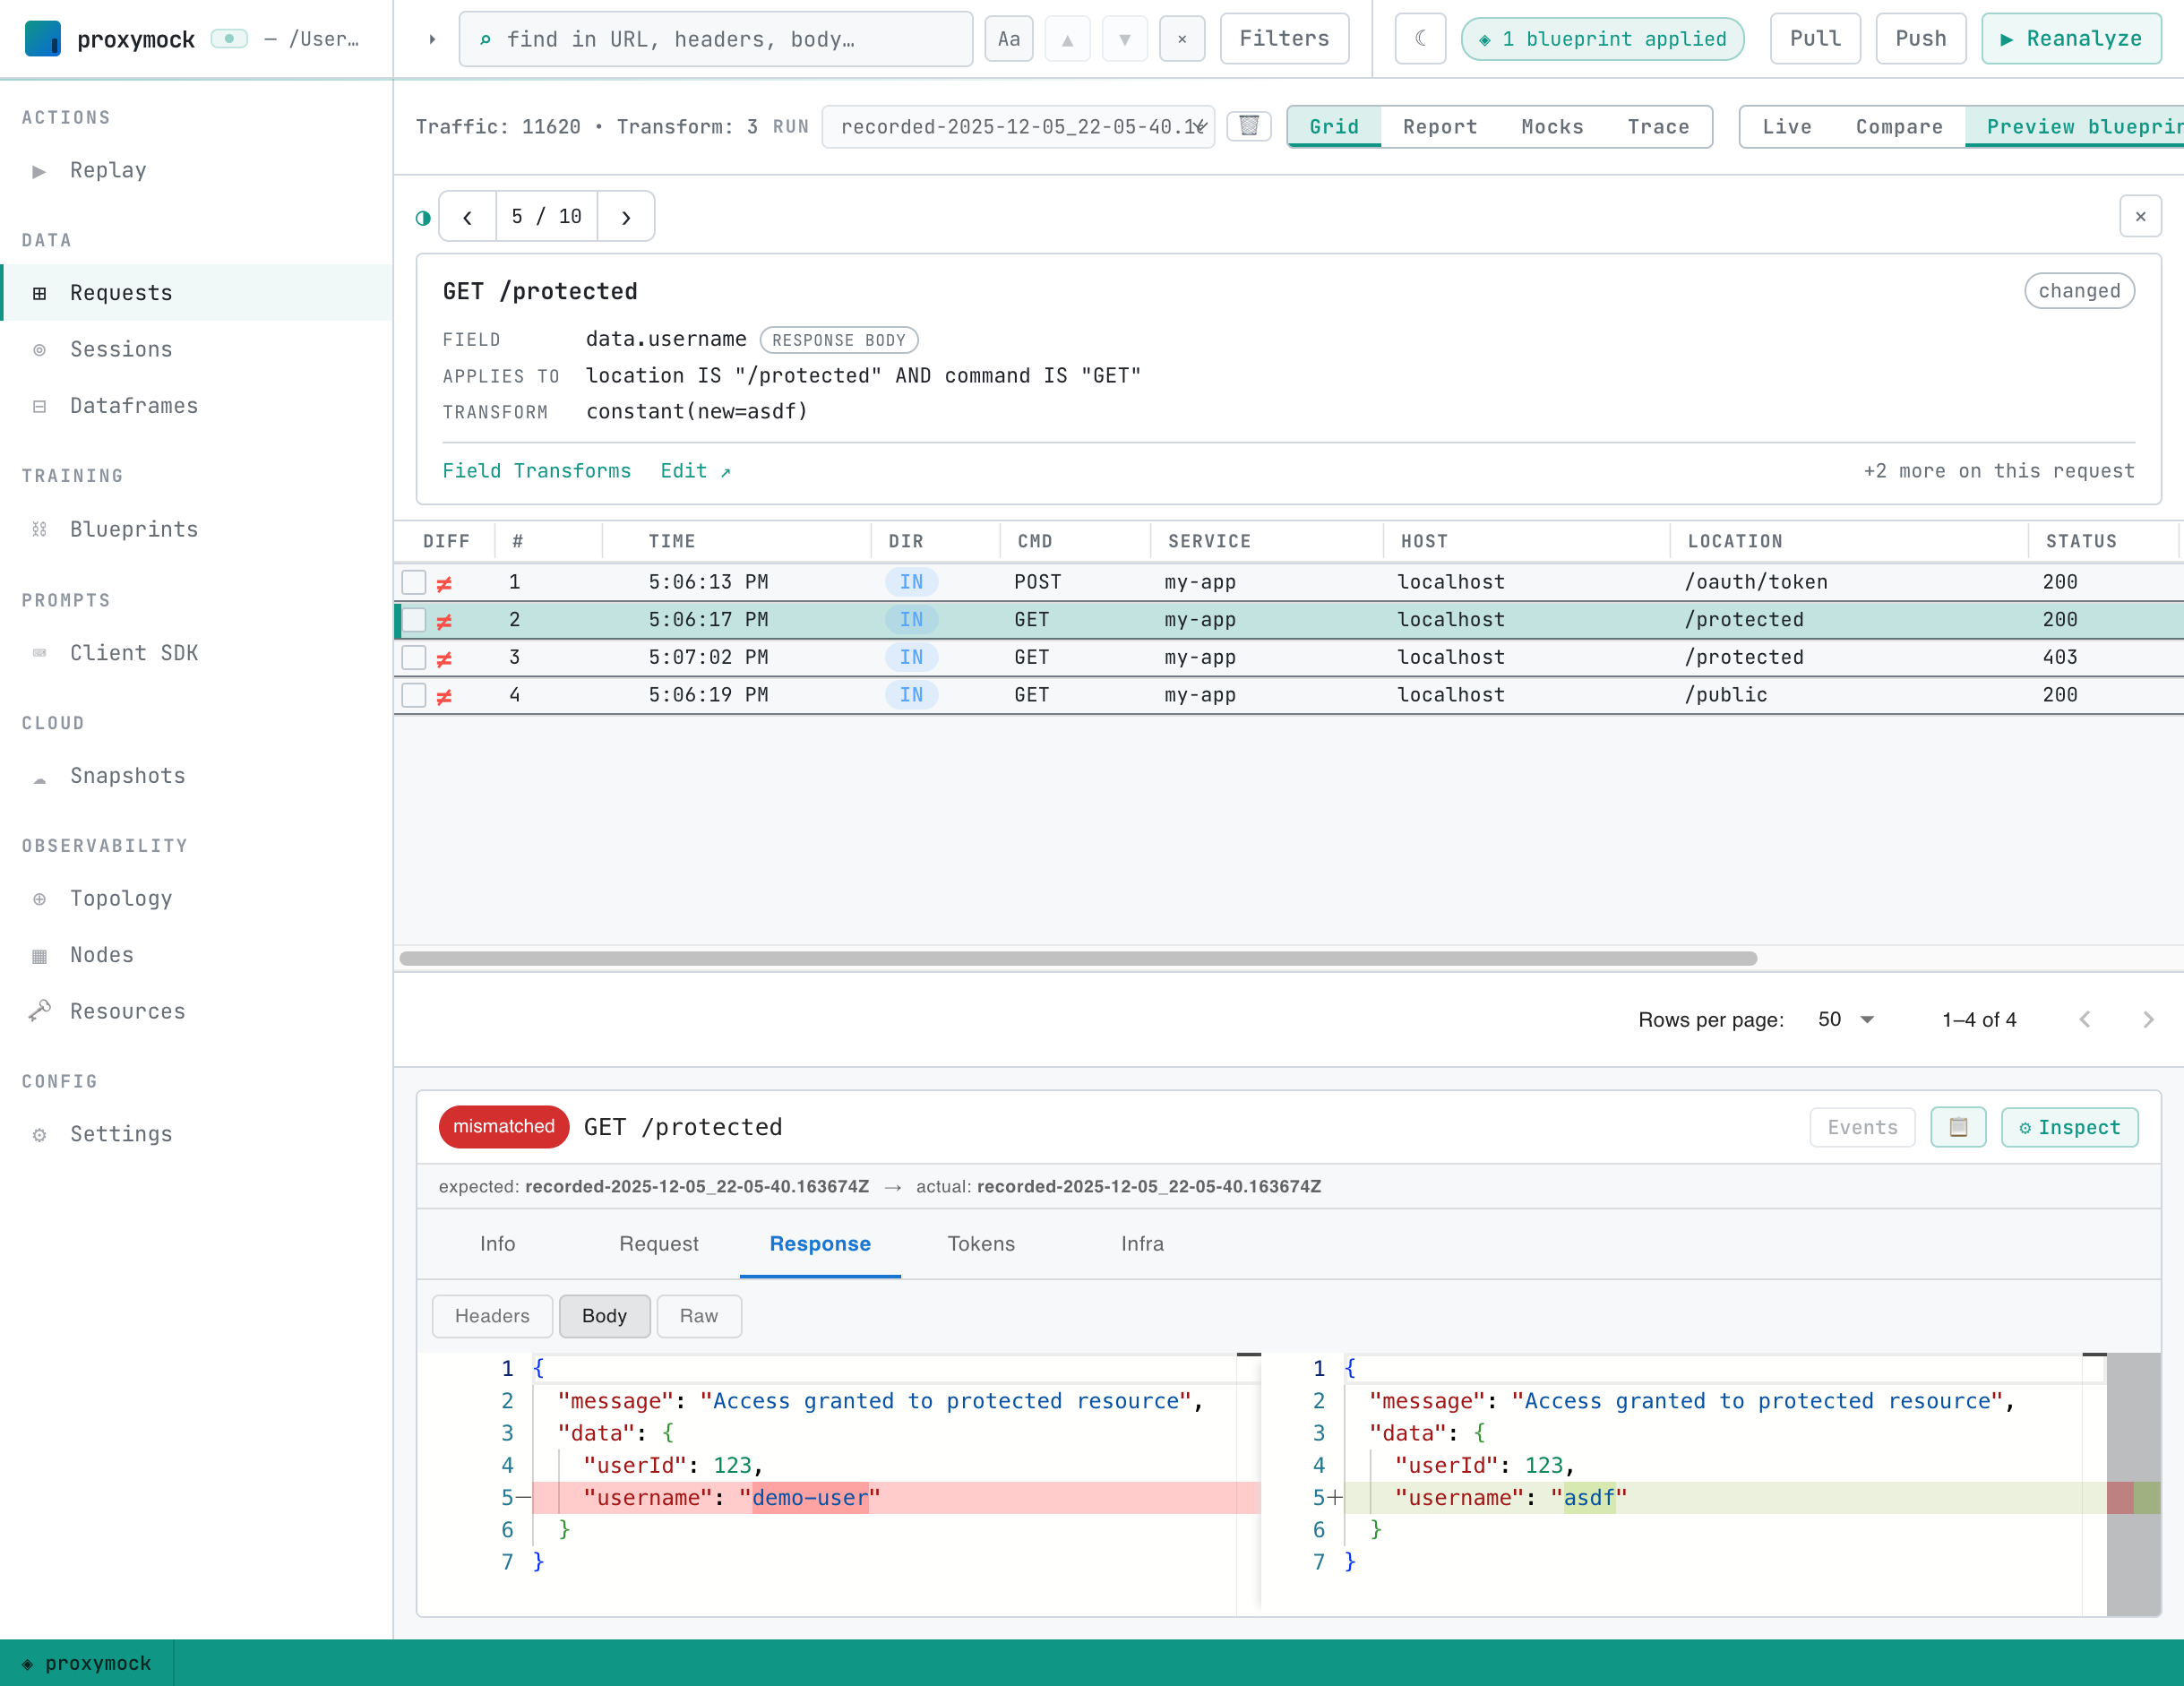
This is the quickest way to confirm a new rule does what you expect — and only what you expect — before committing to a full replay.