Swap HTTP Basic Auth Credentials Between Environments
A recording captured against a development environment almost never carries credentials your staging or test target will accept. The Basic auth credentials swap automation in proxymock web rewrites the Authorization: Basic … header on every recorded request at replay time, using a CSV dataframe you can edit per recorded user.
This guide walks through the full path: record traffic in one environment, ship it to a staging machine via S3, swap the credentials, and replay against a different backend.
Before you begin
- proxymock installed
- AWS CLI configured with credentials to read and write the bucket you plan to use
- The target application running on a local port the recording can be replayed against
1. Record traffic against your local app
In the dev environment, start your application under proxymock so every inbound request/response is captured. The --app-port flag tells proxymock which local port to attach to, and anything after -- is the command to launch your app:
proxymock record --app-port 3000 -- node index.js
proxymock writes the recording to proxymock/recorded-<timestamp>/ next to where you ran the command. It works headless — no UI required — so the same invocation runs cleanly inside CI containers or remote dev pods.
Exercise the flows you want to test (curl, the app's own UI, an integration test), then stop the process with Ctrl-C. The proxymock/ directory now holds everything you need to replay later.
If a Speedscale eBPF or goproxy collector is already recording traffic for the service you want to test, you can skip the local proxymock record step. Create a snapshot from the captured traffic in the Speedscale dashboard, then pull it onto your machine instead:
proxymock cloud pull snapshot <snapshot-id>
This drops the recorded RRPair files into your workspace just like a local proxymock record would, and the rest of this guide (the credentials swap, the replay, the verification) is identical from there. Steps 2 and 3 are only needed when you have to move a local recording between machines manually.
2. Push the recording to cloud storage
Move the recording to a shared bucket so a staging machine can pull it. Use whatever path layout your team prefers; each cloud's CLI has a recursive sync that handles the proxymock/ directory tree as-is.
The --exclude flag skips any previous replay output — the recording itself lives under recorded-*/, and anything else can be regenerated on the destination side. If you want only the latest recording, pass that subdirectory directly.
- AWS (S3)
- Google Cloud (GCS)
- Azure (Blob Storage)
aws s3 sync ./proxymock s3://speedscale-recordings/my-app/2026-05-11/proxymock --exclude "results/*"
gcloud storage rsync --recursive --exclude="results/.*" ./proxymock gs://speedscale-recordings/my-app/2026-05-11/proxymock
--exclude uses a regex (not a glob), which is why the pattern is results/.* rather than results/*. If your environment still has the older gsutil tool, the equivalent is gsutil -m rsync -r -x "results/.*" ./proxymock gs://….
azcopy sync ./proxymock "https://<account>.blob.core.windows.net/speedscale-recordings/my-app/2026-05-11/proxymock" --recursive --exclude-pattern "results/*"
Replace <account> with your Storage Account name and authenticate with azcopy login (or append ?<sas-token> to the URL) before the first sync.
3. Pull the recording onto a staging machine
On the staging machine, pull the same prefix down to a workspace you'll run proxymock against:
- AWS (S3)
- Google Cloud (GCS)
- Azure (Blob Storage)
aws s3 sync s3://speedscale-recordings/my-app/2026-05-11/proxymock ./proxymock
gcloud storage rsync --recursive gs://speedscale-recordings/my-app/2026-05-11/proxymock ./proxymock
azcopy sync "https://<account>.blob.core.windows.net/speedscale-recordings/my-app/2026-05-11/proxymock" ./proxymock --recursive
You now have an identical workspace layout: proxymock/recorded-<timestamp>/<host>/*.md plus an empty proxymock/results/. Everything downstream — the credentials swap, the replay, the result viewer — runs from this directory.
4. Launch proxymock web
From the parent of proxymock/, start the web UI:
proxymock web
The default workspace is the proxymock/ subdirectory of wherever you run the command. The first start mints a stable snapshot id and writes it to proxymock/.metadata/snapshot.json; that file pins all subsequent automations, dataframes, and blueprints to one identity that survives restarts.
5. Run the Basic auth credentials swap
Click ⚡ Automations in the top-right of the Requests view to open the registry of one-click workflows. Pick Basic auth credentials swap under the Credentials group:
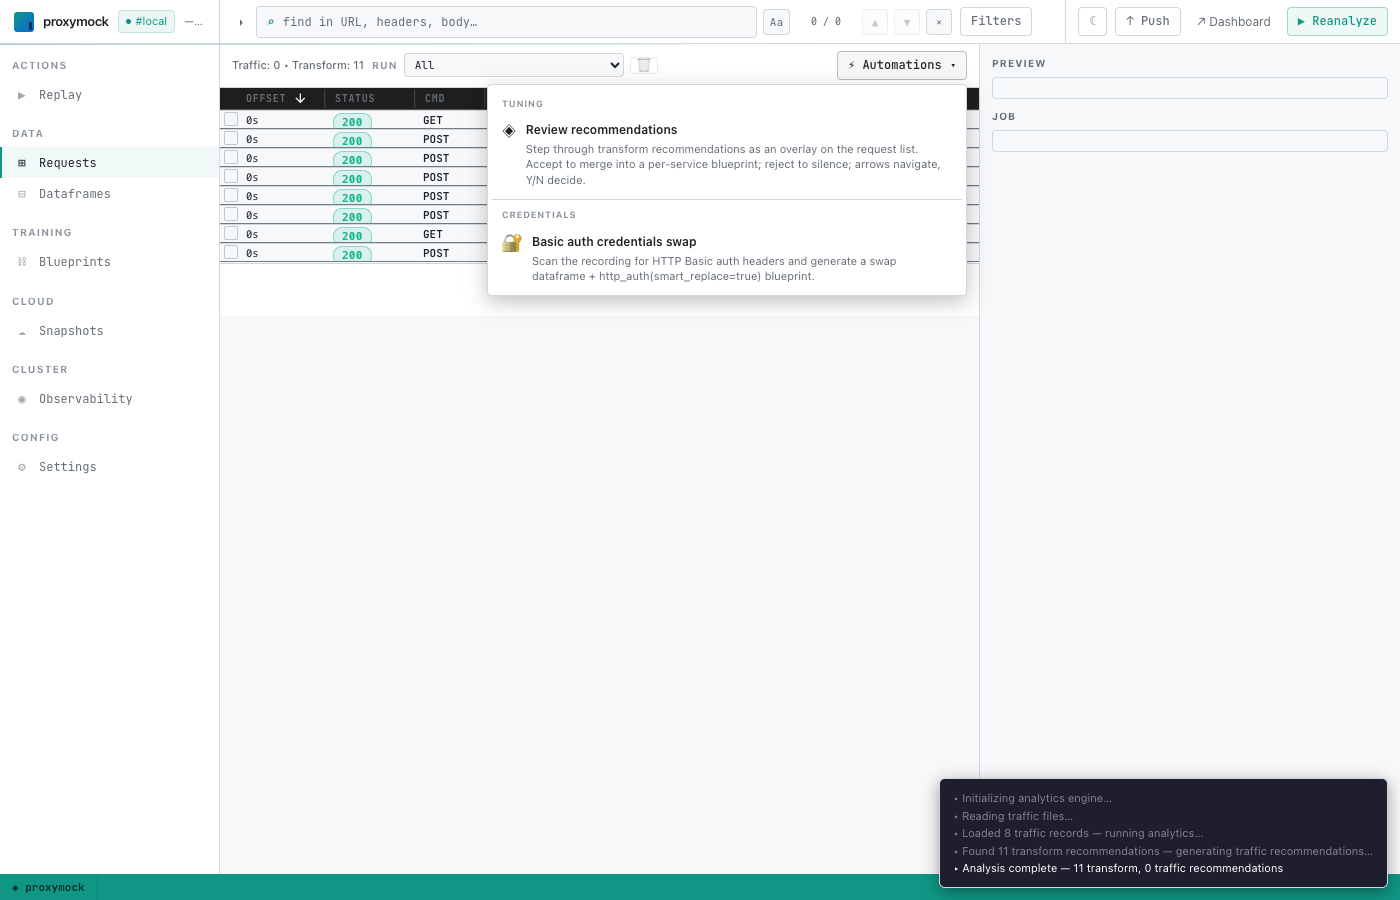
proxymock scans every recorded request for an Authorization: Basic header, decodes each value, and creates a dataframe with one row per distinct recorded user. It then opens the new dataframe in the editor with a banner explaining what to do:
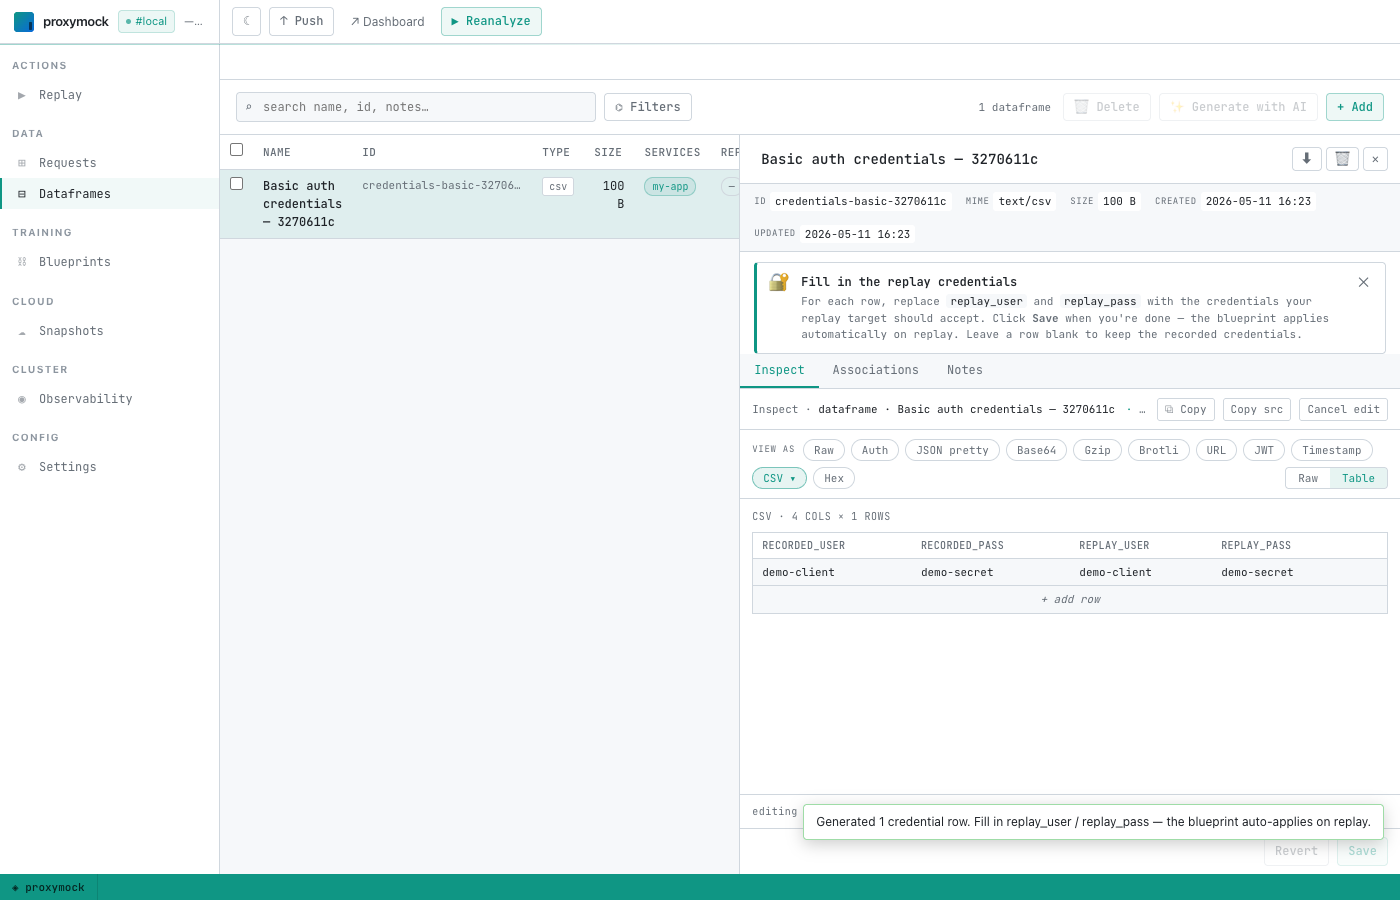
The CSV has four columns:
| Column | Meaning |
|---|---|
recorded_user | The username extracted from the recording. Used as the primary key when the swap fires at replay time — proxymock looks each request's recorded user up in this table. |
recorded_pass | The recorded password. Informational; keeps recorded_user rows distinguishable for you. |
replay_user | The username you want sent to the replay target. |
replay_pass | The password you want sent to the replay target. |
Replace replay_user and replay_pass for any row whose credentials should be swapped, then click Save. Leave a row's replay_* cells blank to pass the recorded values through unchanged.
Behind the scenes the workflow also writes a blueprint at proxymock/blueprints/<uuid>.json that ties the dataframe to an http_auth(smart_replace=true) transform chain. You don't need to touch the blueprint — proxymock will auto-apply it on every replay.
6. Run the replay
Click ▶ Replay in the left sidebar to open the replay wizard:
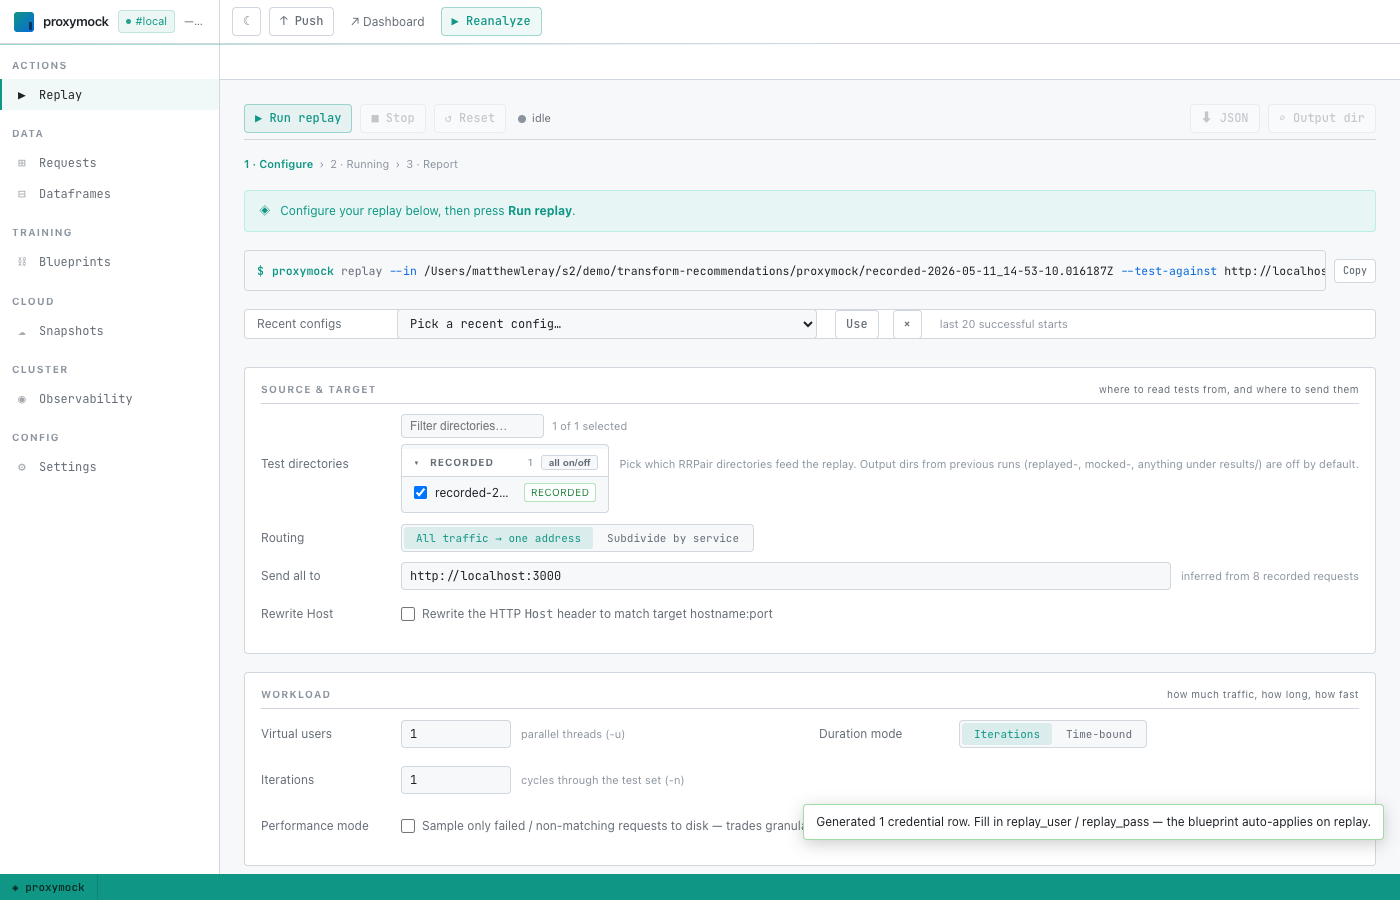
The wizard pre-fills the test directories from your recording and infers a likely target host. Set Send all to to the staging app's listening address (for example, http://localhost:3000) and click ▶ Run replay.
A console at the top streams what proxymock is doing — including a confirmation that the blueprint was merged:
Applied 1 active blueprint(s) to replay.
When the replay finishes, proxymock writes the observed request/response pairs to proxymock/results/replayed-<timestamp>/.
7. Verify the swap
Switch back to the Requests tab. The Run dropdown at the top of the list now offers the replayed run alongside the original recording — pick the results/replayed-… entry:
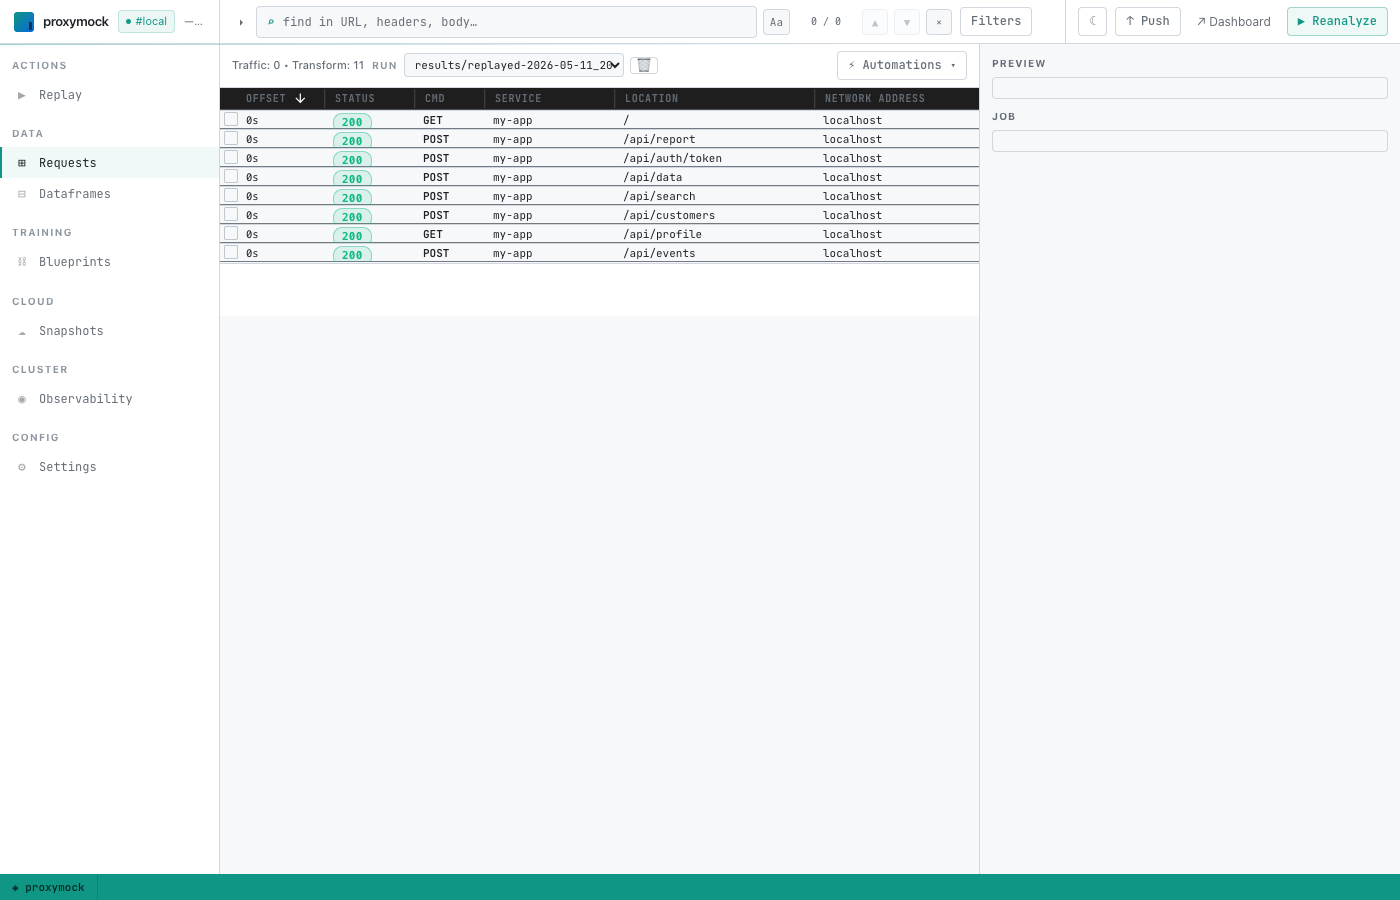
Find the request that originally carried the Authorization: Basic header (in the demo workspace this is POST /api/auth/token), click it to open the detail panel, switch to the Request sub-tab, and inspect Headers:
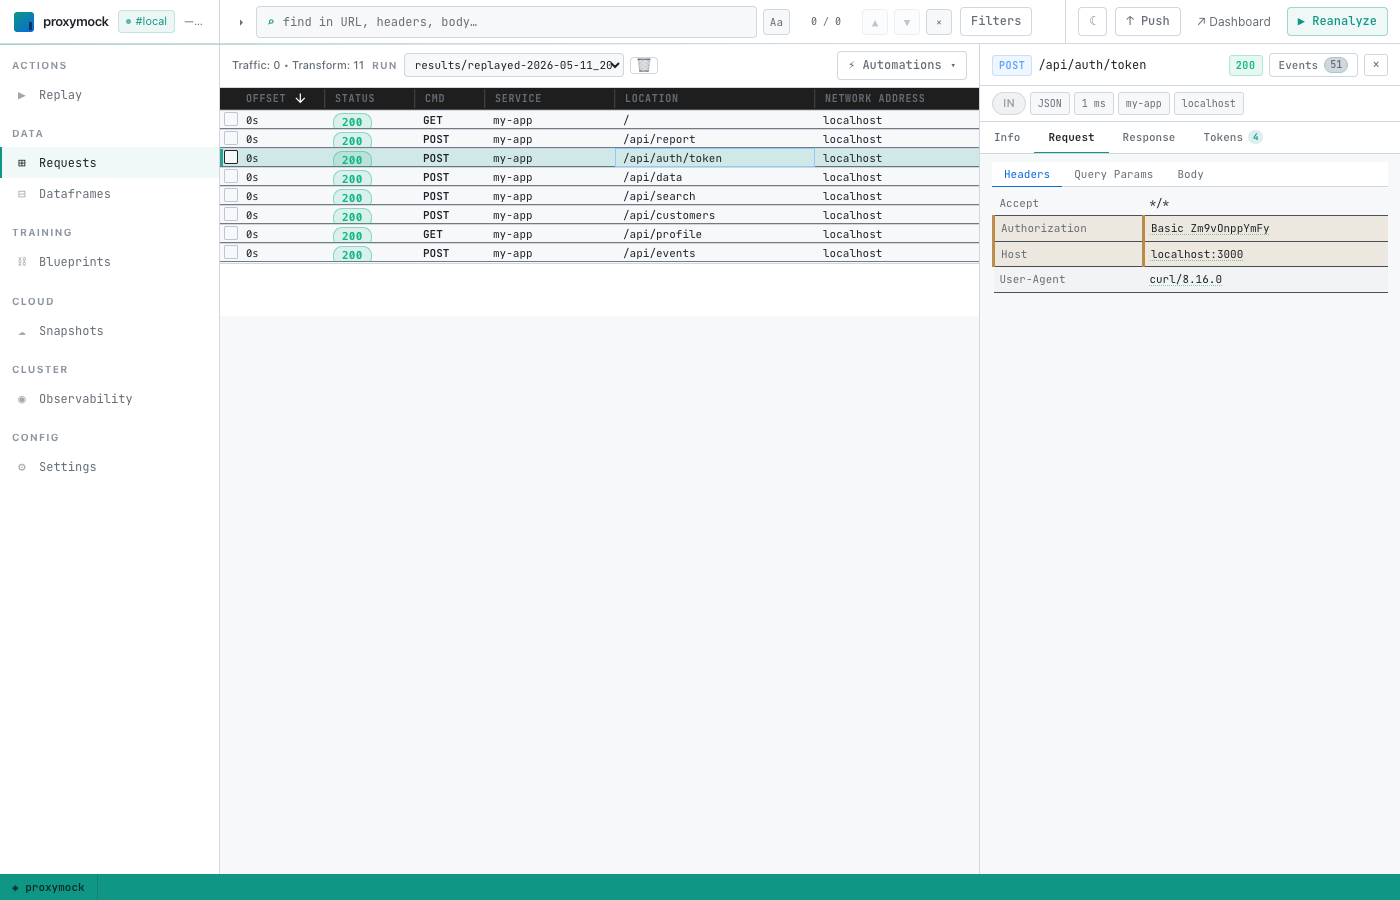
The Authorization value should now base64-decode to your edited replay_user:replay_pass. If you used foo / zibar, the header reads Basic Zm9vOnppYmFy.
Headless / CI usage
Every step above maps to a CLI command, so the full workflow runs unattended inside a pipeline. The new piece is proxymock automation credentials-basic — it's the headless equivalent of the Basic auth credentials swap Automations-menu click, producing the same dataframe and blueprint without a browser session.
# Discover available automations.
proxymock automation list

# Inspect flags for one.
proxymock automation credentials-basic --help
One-shot script
#!/usr/bin/env bash
set -euo pipefail

# Either record locally, or pull from a cloud snapshot captured by an
# eBPF / goproxy collector. Both produce the same proxymock/ layout.
proxymock cloud pull snapshot "$SNAPSHOT_ID"

# Generate the swap. --replay-user / --replay-pass pre-fill the CSV so
# CI doesn't need a follow-up edit step. Repeat the flags once per
# recorded user that needs different credentials; leave a user out to
# pass the recorded credentials through unchanged.
proxymock automation credentials-basic \
  --in ./proxymock \
  --replay-user demo-client="$STAGING_USER" \
  --replay-pass demo-client="$STAGING_PASS" \
  --output json > swap.json

# Replay against the staging app. The blueprint generated above
# auto-applies because `proxymock replay` merges active blueprints into
# the transient .proxymock-replay metadata file before running.
proxymock replay --in ./proxymock --test-against "$STAGING_HOST"

# Assert the rewritten Authorization landed on the auth-token request.
expected="Basic $(printf '%s:%s' "$STAGING_USER" "$STAGING_PASS" | base64)"
latest=$(ls -td ./proxymock/results/replayed-* | head -1)
grep -q "^Authorization: $expected" "$latest"/*/*.md
Step-by-step CLI mapping
| Guide step | Headless equivalent |
|---|---|
| 1. Record traffic | proxymock record --app-port <port> -- <app-cmd> |
| 1-alt. Pull from cloud snapshot | proxymock cloud pull snapshot <id> |
| 2. Push recording | aws s3 sync / gcloud storage rsync / azcopy sync (see step 2 above) |
| 3. Pull recording | Same tools in reverse |
| 4. Launch UI | Skip — not needed for CI. The CLI commands in step 5 read/write the same proxymock/ directory directly. |
| 5. Generate swap dataframe + blueprint | proxymock automation credentials-basic --in ./proxymock [--replay-user recorded=replay …] [--replay-pass recorded=replay …] |
6. Edit replay_user / replay_pass | Pre-fill via the --replay-user / --replay-pass flags on step 5, or edit proxymock/dataframes/credentials-basic-<id>/payload.csv with your editor of choice between steps 5 and 7 |
| 7. Run replay | proxymock replay --in ./proxymock --test-against <host:port> |
| 8. Verify | grep "^Authorization:" ./proxymock/results/replayed-*/<host>/*.md (or proxymock inspect <results-dir> for the TUI) |
What got persisted
| Path | Survives restart? | Purpose |
|---|---|---|
proxymock/.metadata/snapshot.json | Yes | Stable snapshot id. All blueprints and dataframes the workflow creates are tagged with this id. |
proxymock/blueprints/<uuid>.json | Yes | The http_auth(smart_replace=true) chain. Edit it from the Blueprints tab if you need to widen or narrow which requests it applies to. |
proxymock/dataframes/credentials-basic-<id>/payload.csv | Yes | The user/pass swap table. Re-open from the Dataframes tab to add or change rows; saves take effect on the next replay. |
proxymock/.proxymock-replay/.metadata/snapshot.json | Overwritten on every replay | Transient — proxymock merges the active blueprints here and tells the replay runner to read it. Never edit by hand. |
proxymock/results/replayed-<timestamp>/ | Yes | The observed request/response pairs from a replay run. Pick one from the Run dropdown in the Requests view. |
Troubleshooting
The replay log doesn't say "Applied N active blueprint(s)…"
The replay runner couldn't find a matching blueprint for the workspace's current snapshot id. Most often this means proxymock/.metadata/snapshot.json was deleted (or the workspace was opened with an older proxymock build that didn't persist it). Re-run Basic auth credentials swap — it will create a fresh blueprint tied to the current snapshot id.
The Authorization header on the replayed request still decodes to the recorded credentials.
You saved the dataframe with replay_user/replay_pass equal to the recorded values (the editor auto-fills them on first generation to make the workflow a safe no-op). Open the dataframe from the Dataframes tab, set the replay cells to the credentials you actually want, save, and re-run the replay.
no Basic auth credentials found in recording (skipped N malformed)
The recording doesn't carry any Authorization: Basic <base64> headers, or every value proxymock found failed to decode. Bearer-token and AWS SigV4 auth aren't handled by this workflow — those are separate automations on the roadmap.