Virtual Machines
Prerequisites
Setting up local capture
Run:
speedctl capture <service_name> <service_port> --daemon
This will setup Speedscale proxies for both inbound and outbound capture.
To test out the inbound capture mechanism, you can make requests as you normally would but using localhost:4143 instead of the port your app is serving on.
To configure outbound capture, configure your application to use the socks
proxy running on *:4140 on your server, and
configure it to trust the local certificates.
Setting up global capture
The steps above setup an inbound proxy on port 4143 that forwards requests to your app but so far we've only captured request explicitly going to that port. To capture all existing traffic going into your app, you'll need to edit your load balancer.
- AWS
- Google Cloud
Create a new target group/backend

We have an existing target group going to our app which serves on port 8080. We're going to create a new one with identical settings, the only difference will be the port 4143.
Make sure to configure the health check correctly, it should be identical to the existing one.

Check the security groups
Make sure the security groups/firewall rules for the load balancer and the VM allow traffic to flow between them.
The inbound group for the EC2 should allow traffic on 4143
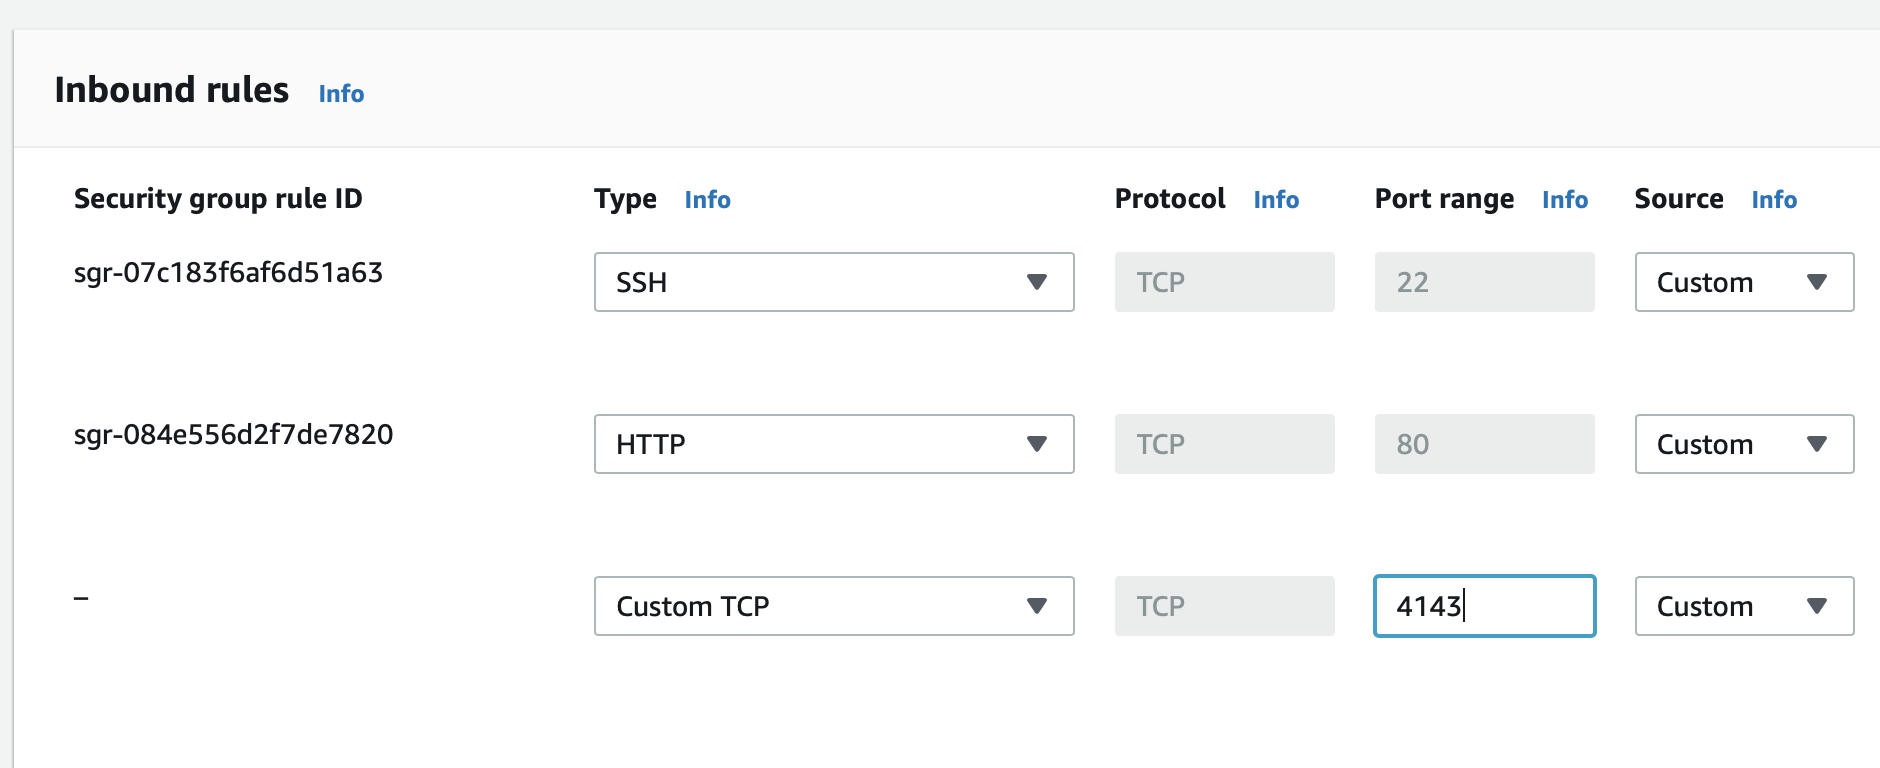
The outbound group for the ALB should allow traffic out to 4143 as well

Modify the listener
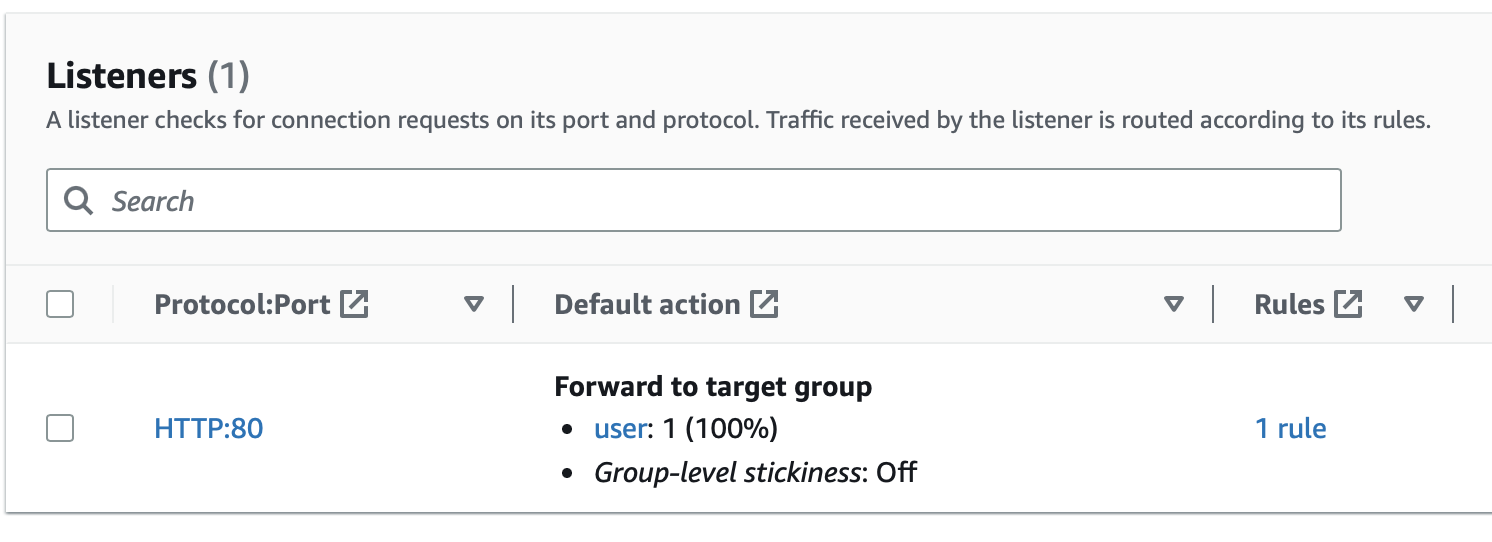
We have an existing listener where HTTP traffic is forwarded to our listener called user that hit our app directly. We're going to edit this so that the load balancer forwards traffic to our new target group.
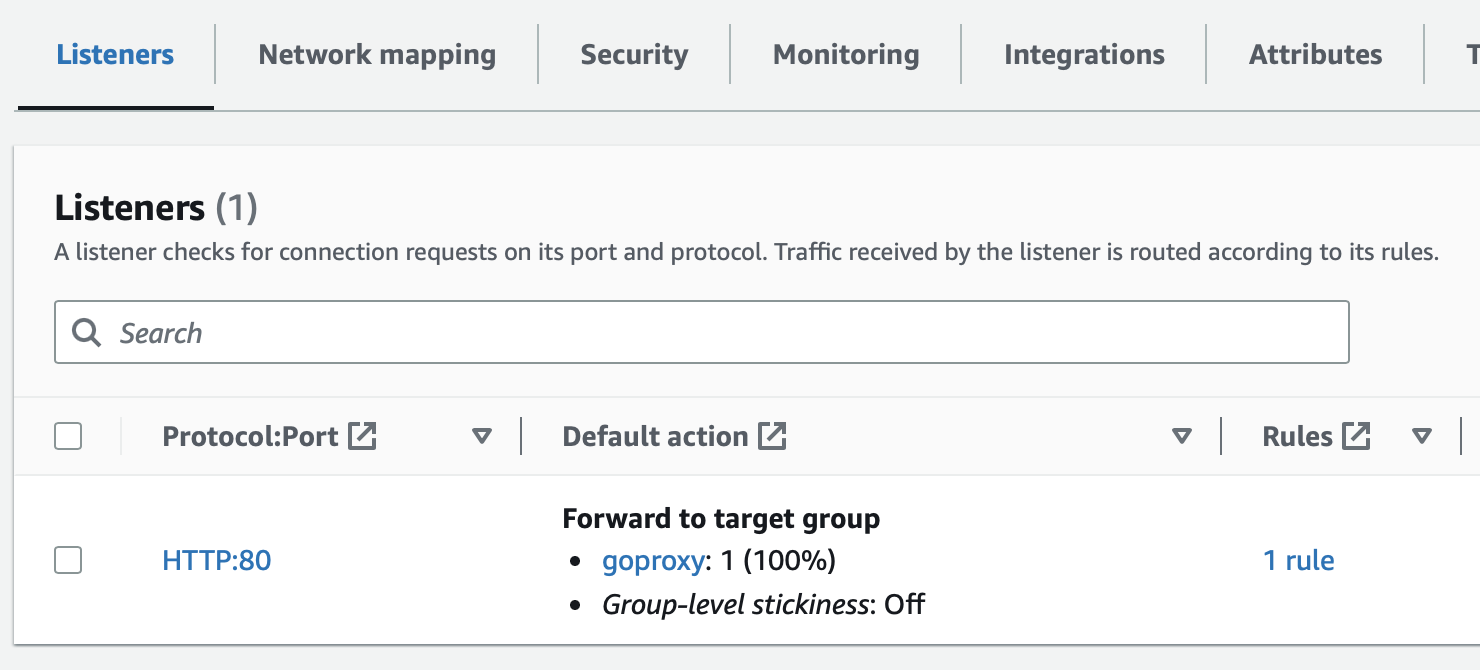
That's it! Now all traffic will be forwarded to the Speedscale proxy and be available for analysis
Add a named port
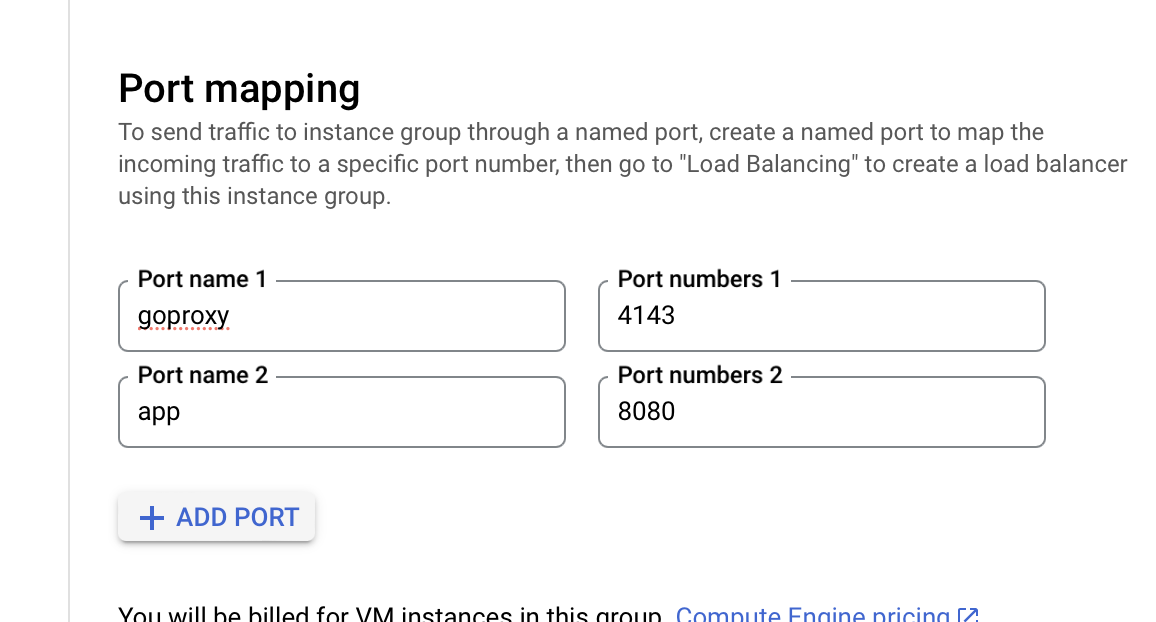
We have an existing instance group going to our app with a defined port 8080. We're going to add 4143 to our instance group for the proxy.
Create a backend
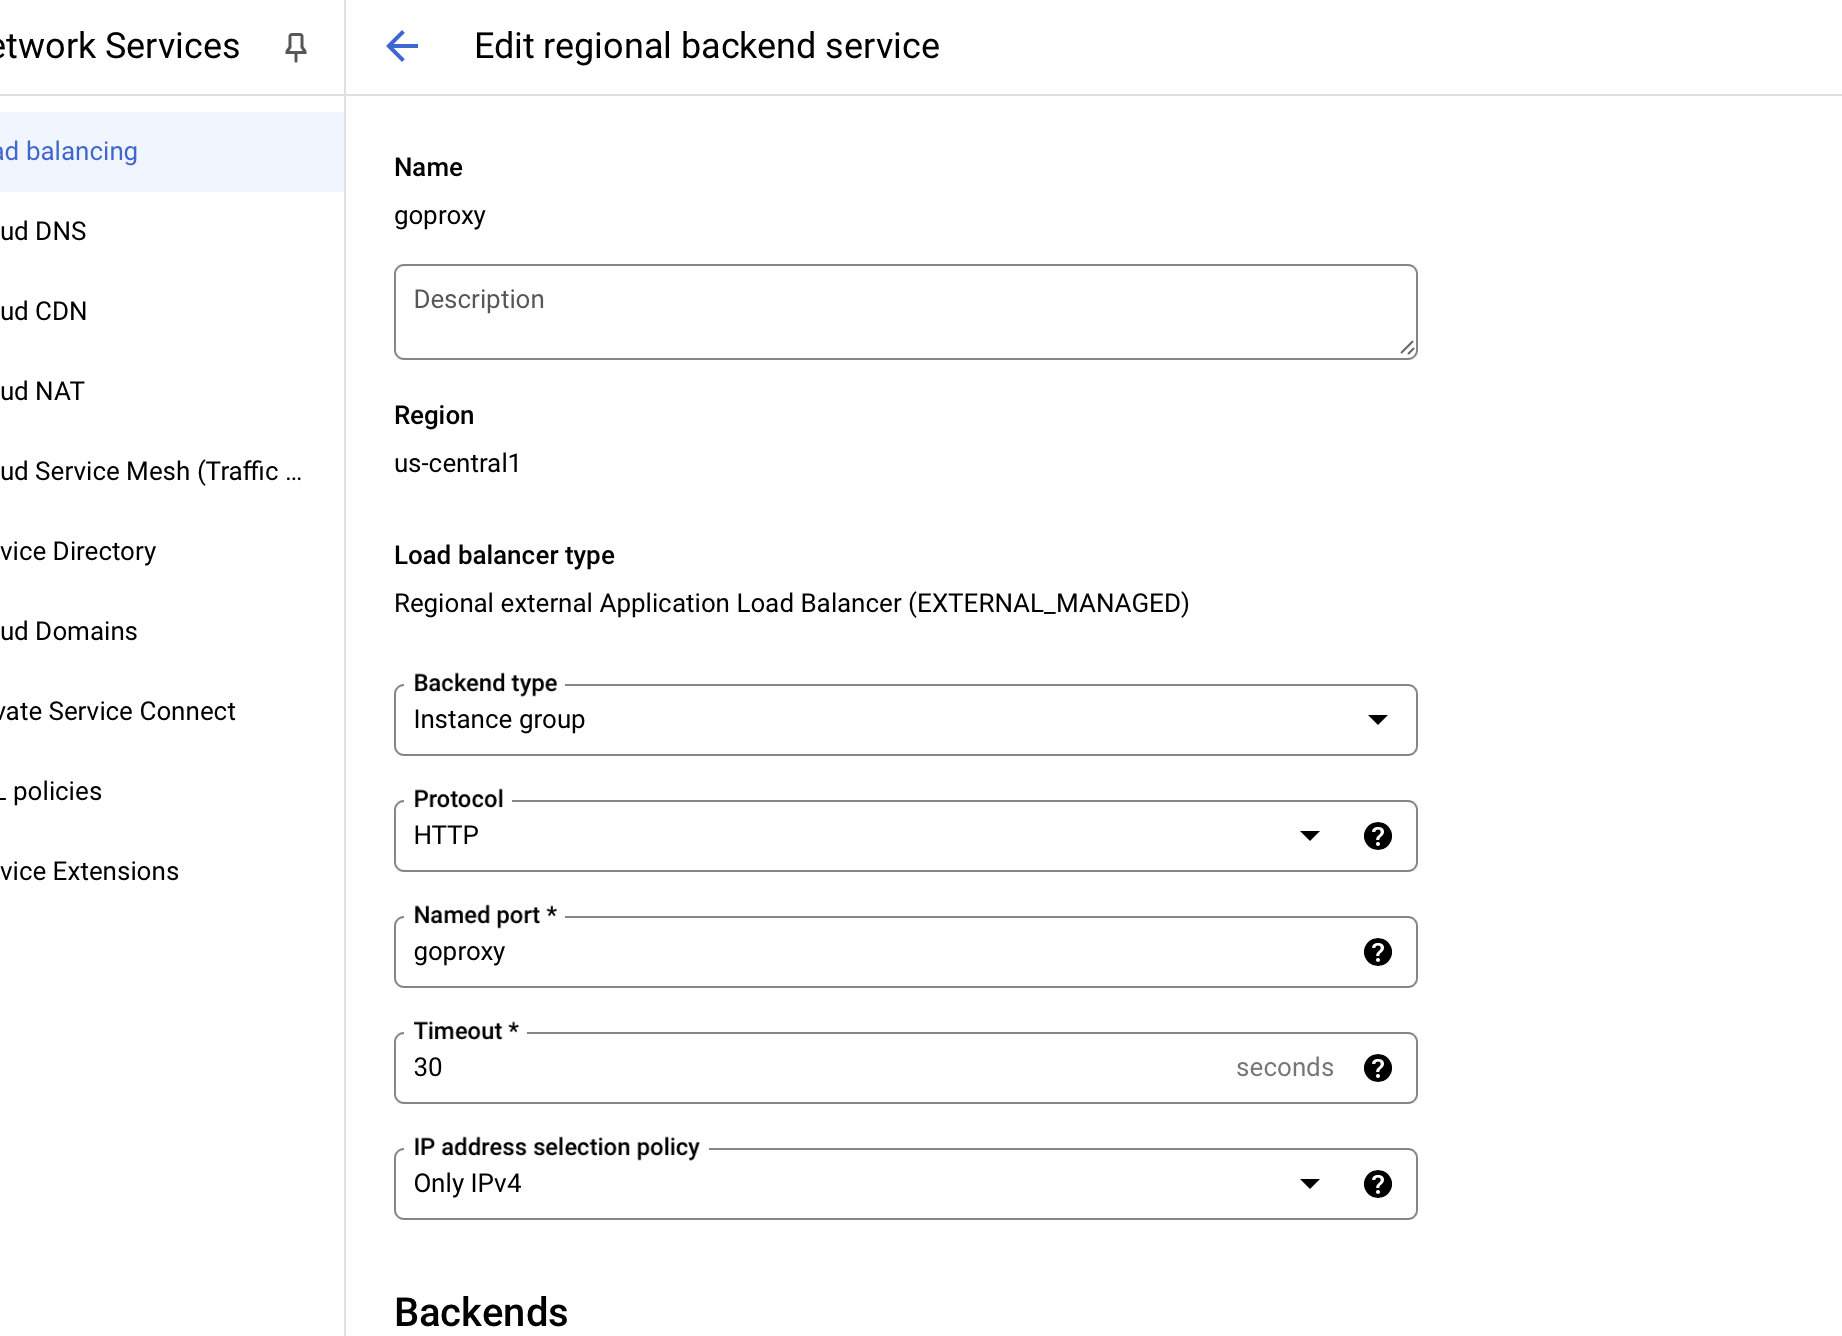
Create a new backend which points to the instance group but with our new port.
Modify the Load Balancer

We have an existing load balancer where HTTP traffic is forwarded to our original backend that hit our app directly. We're going to edit this so that the load balancer forwards traffic to our new target group.
That's it! Now all traffic will be forwarded to the Speedscale proxy and be available for analysis
Analyze Traffic
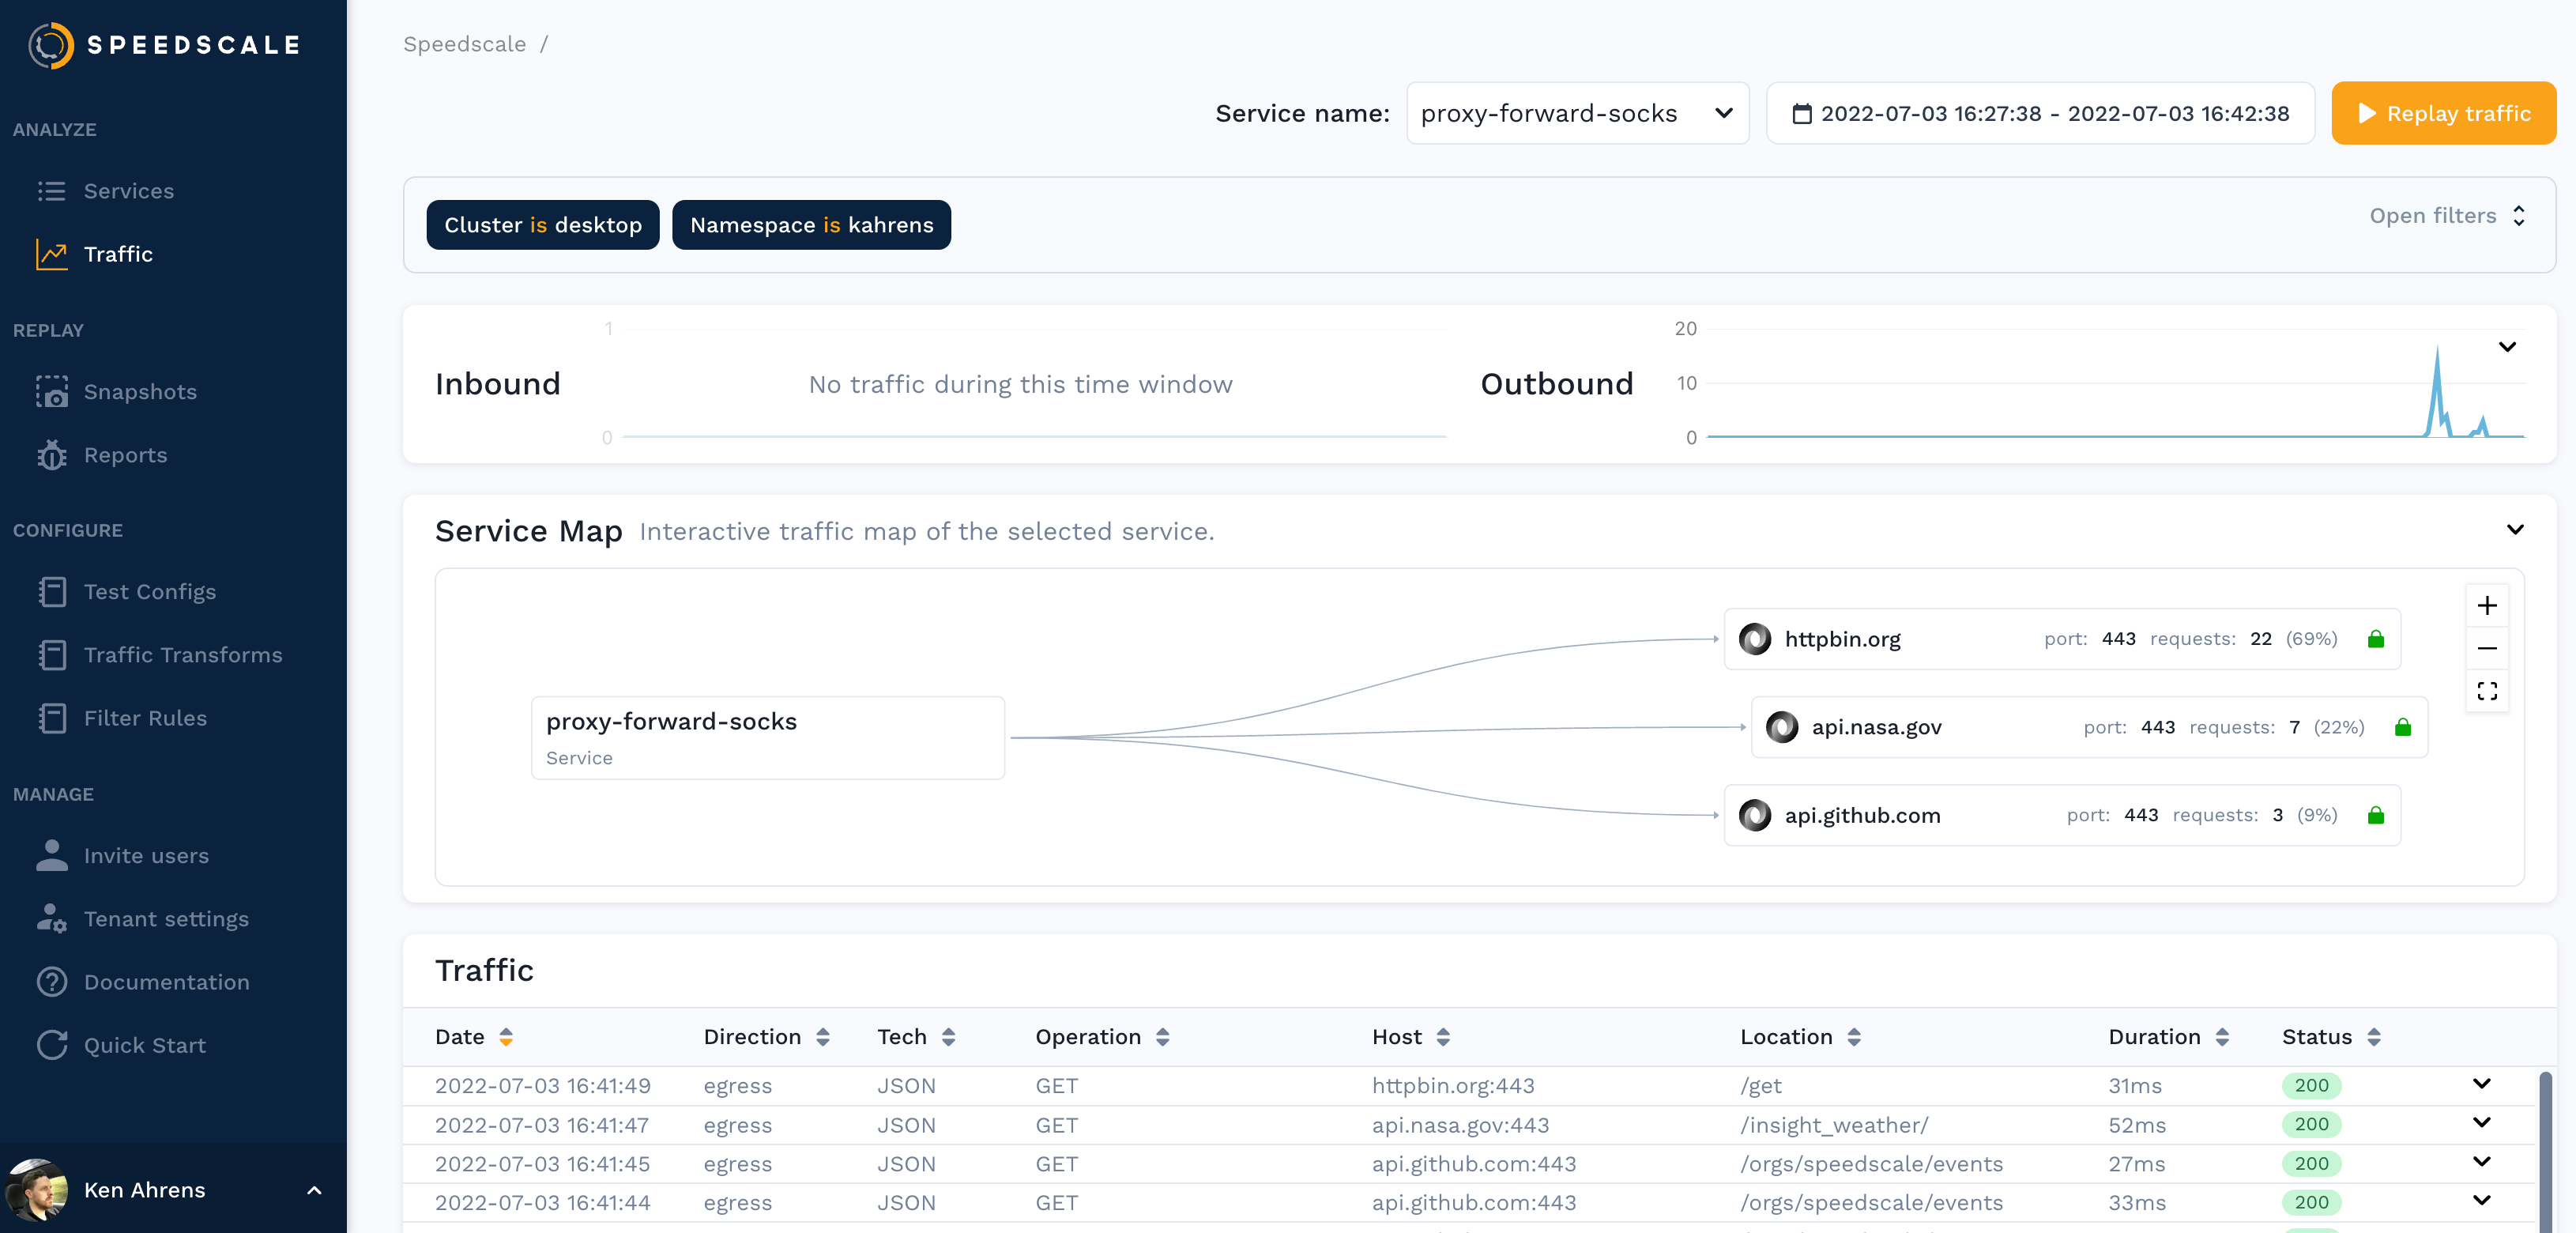
You should be able to see traffic in the Speedscale UI after a few minutes and now you can using this traffic to create a snapshot.
Replaying Traffic
Replaying traffic is similar to the capture step
above. Run speedctl replay <snapshot_id>
This will generate a report which you can find on the reports page.